Tuesday, August 31, 2010

Going, Going, Gone!

As from tomorrow, we will know which current products will be retiring at the end of September when Stampin' Up! issue the "Last Chance" list.  I will give details as soon as I am able to tomorrow.

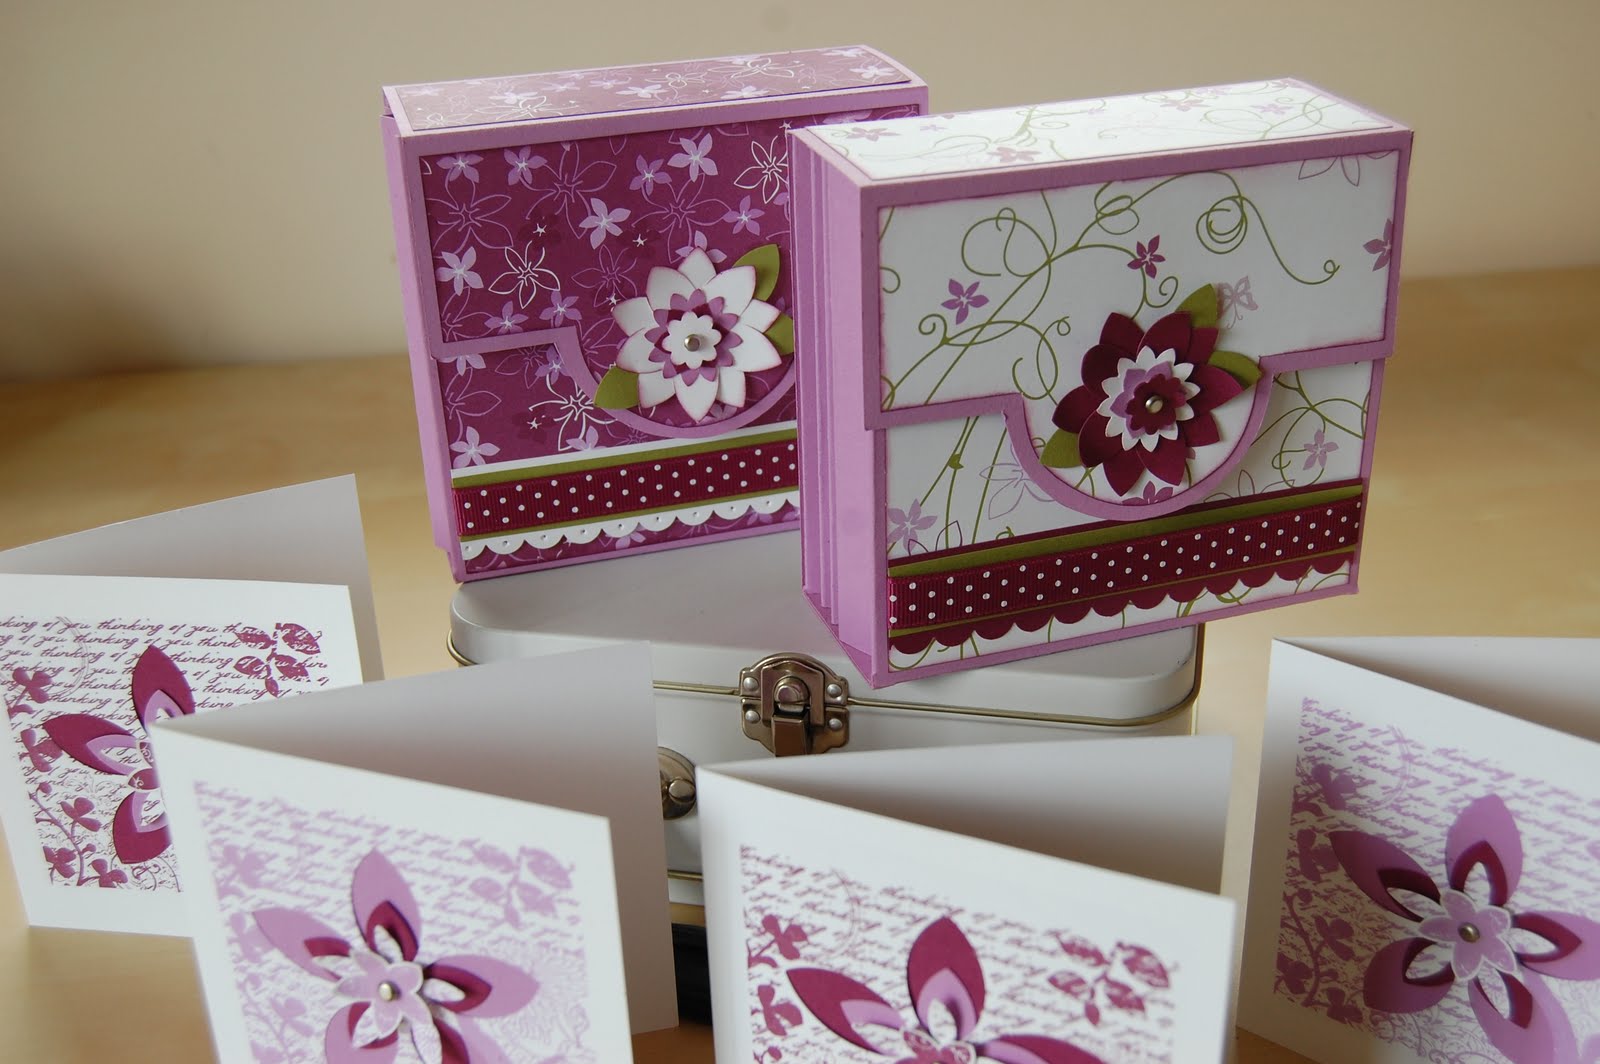
In these Thank You cards I have used some of the "Cottage Wall" DSP which are definitely retiring and will not be making it into the 2010/2011 Idea Book & Catalogue.  I will be sad to see these papers go as the colours are so lovely, but I am also excited to see what new papers will we be getting in the new catty.

These cards have very little stamping on them, in fact only the greeting is stamped, the flowers have been created using the Scallop Circle Punch and the Boho Blossom Punch with a Silver Brad attached to the centres.  As I make many thank you cards for my customers I have to keep them quite simple and these flowers are so quick to put together.  Click on the photo for an enlarged image and to see how the scallop circle has been cut.

Check back tomorrow for details on the "Last Chance" list of all the retiring products, and if you would like to receive a copy of the new 2010/2011 Idea Book & Catalogue, just drop me an email to reserve your copy and delivery will commence at the beginning of October. 

Friday, August 27, 2010

Fancy a slice of Stampin' Up!!!

If you book a Stampin' Up! Party with me for November or January (January is the Sale-a-bration promotion) you get to pick a slice of my cake (not my idea I would like to add, but what a fabulous one it is!) 

Inside each slice of cake is a ticket revealing your prize, from Ink Pads to Stamps, every slice is full of something scrumptious, so what are you waiting for, being a hostess is so easy, just invite your friends, family and colleagues around for a fun evening being creative and at the same time earn yourself some free Stampin' Up! products.  What better way to build your stash!

My cake toppings were created using the Oval Punch for the main flower and the Boho Blossoms Punch for the smaller flowers, adding a Clear Rhinestone to finish.
If you would like more information about hosting a Stampin' Up! party, just email me at stampinkerry@aol.com.

Tuesday, August 24, 2010

A Gift for my Hostess

Today I wanted to show you the gift I gave to my hostess Janet at her Stampin' Up! party last week.  I demonstrated how to create this little gift pouch, using lots of products to introduce Janet's guests into the wonderful world of Stampin' Up!  I demonstrated the "Kissing Technique" using the "Flower Accent" and "Fine Flourish" stamps.  Sorry for the poor quality picture, I must have had a wobble when I took it as it appears a little blurred!  Inside the pouch were samples of the Polka Dot Ribbons in Rich Razzleberry, Melon Mambo and Soft Suede as a gift to my hostess.  These gorgeous ribbons won't be around for much longer, they will be disappearing at the end of September!

September's hostess gift I demonstrate will be different to this one, and remember, as a hostess you can earn yourself lots of Stampin' Up! goodies for free, along with exclusive "hostess only" stamp sets, so what are you waiting for, give me a call today to book your party!

Monday, August 23, 2010

Circle Circus

I just love the versatility of this stamp set, so many different occasions, masculine, feminine cards, and beautiful for scrapbook layouts too.

I haven't used this set at for a while so I decided to get it out to use on some most needed Thank You cards.  I used Soft Suede, Pumpkin Pie and Apricot Appeal, a nice combination of colours that worked well together.  I also made another batch of these cards in a different colourway, quite straight forward which is important when making cards in bulk, although if you click on the photo to enlarge it you will see that I did a bit of decoupage with the flowers on the centre circle so there was some handcutting involved.  I chose my greeting from the "Trendy Trees" stamp set, remember this set has an amazing 20% off during the month of August, so don't delay, there's not long left to grab yourself a bargain!

Thanks for dropping by, back soon with some more creations!

Sunday, August 22, 2010

Make and Take

On Thursday night I had a workshop for Janet and here is the make and take that everyone created.  Now there was a mixture of seasoned crafters and "never before" crafters and although the card involved the use of the "Stamp-a-ma-jig" everyone coped very well.  We used "Flight of the Butterfly" stamps which are so gorgeous and also "Dot, Dot, Dot" the mini background stamp and one of the greetings from "Basic Phrases".
Our colour combination was Perfect Plum, Pale Plum (soon to be retired, awww) and Certainly Celery, teamed with Very Vanilla cardstock for the stamping.

The evening flew by so quickly and everyone was very impressed with their completed cards.  Thank you Janet for inviting your friends along for a lovely evening and I am sure you will be looking forward to receiving your free hostess goodies soon!

If you would like to host a Stampin' Up! Party in the comfort of your own home just email me at stampinkerry@aol.com for further details on how you could be earning free Stampin' Up! products whilst having fun at the same time!

Tuesday, August 17, 2010

Tree Trimmings Class

Last night I held my "Tree Trimmings" Class where we made an incredible 6 cards in an evening, quite a push I know but we got there in the end, thank you ladies for coming along, I hope you enjoyed the class and weren't too tired by the time you got home!

We made an assortment of card styles, all using "Tree Trimmings" and used the "Season of Joy" stamp set for the greeting and swirl.  The DSP was from "Merry Moments" which has traditional Christmas colours including Old Olive, Real Red and Chocolate Chip which we teamed with Very Vanilla.
and the final three:

I am going to re-run this class in September so will let you know when I have put some dates together, email me if you might be interested in coming along!

Saturday, August 14, 2010

Big Bold Birthday

The second card at the Whitminster Class was created using "Big Bold Birthday" which I have been using quite a lot recently.  Again, this is a Two-Step Stampin' set that is on offer with a fantastic 20% off its usual selling price making it only £19.16 until the end of August, and with 13 stamps in this set the possibilities are endless!

The three main colours we used for this card will all sadly be retiring at the end of September, Brocade Blue, Close to Cocoa and Ruby Red, but of course we will be getting some lovely new colours to play with so shouldn't be too sad about it!

We used the "So Swirly" jumbo wheel on the Close to Cocoa layer, inked with VersaMark ink to create a soft subtle background.  We also attached a couple of Ruby Red Brads to this layer.  The "Make a Wish" greeting is also from "Big Bold Birthday".  The DSP is from the Hostess 6x6" Paper Pad.  Quite a few layers on this card but I was pleased with the finished result and hope that everyone enjoyed creating it too.

Friday, August 13, 2010

Whitminster Card Making Class

With Greenhouse Garden being one of the stamps included in the August Promotion with 20% off its normal selling price, I decided to use it at our monthly class to show its true beauty.

Our slider card had a colour combination of Rich Razzleberry, Orchid Opulence, Certainly Celery and Whisper White, teamed with some of the gorgeous "Cottage Wall" DSP.  We used "En Francais" to create our background on a stamped panel and then stamped flowers from "Greenhouse Garden" hand cutting them and placing them over stamped stems.  We used "Sincere Salutations" for our greeting, a fabulous set that I use time and time again.

Here is the inside, just a simple stamped flower but you could add more if you wanted to:
The ribbon is 1/4" Grosgrain in matching Certainly Celery, this width is perfect for using with slider cards.

Wednesday, August 11, 2010

Making Cards & Gifts Class

Our second project was a card, very sweet for a young one and would be great in Night of Navy/Bashful Blue masculine colours!

Here we have used "Big Bold Birthday" which has 20% off its normal selling price during August, making it a fantastic £19.16 and this set comes with 13 stamps.  This is a two-step Stampin' set which means you build your image using two stamps.  Click on the flyer to the right side of my blog to see the other Two-step Stampin' sets that are on offer, and remember, this offer only runs through to the end of August.

So back to the card, Rose Red, Chocolate Chip and Pretty in Pink, I just love these colours (not that you hadn't noticed!!), I am so glad that these will all be making it through to the 2010/11 Idea Book & Catalogue!  We used the "So Swirly" jumbo wheel in Rose Red Ink for the insert and added 1/2" and 3/4" circles layered with a Pretty in Pink Brad attached through the centre for some texture and interest.
The cupcake frosting was stamped in Pretty in Pink ink then the spots stamped in Rose Red Ink which we hand cut along with the Rose Red cupcake base.  The greeting was stamped in Chocolate Chip and punched out using the Word Window Punch.  The border around this is from the Scallop Oval Punch, hand cut leaving three scallops at either side, cutting from one edge to the opposite edge.  We used a piece of the lovely Satin 5/8" Ribbon in Chocolate Chip tying in a knot to add texture and to balance our card.

Sunday, August 8, 2010

Making Cards & Gifts Class at Thornbury


Jane Cutting showed me some of these cute little bags that she had created and had the fab idea of using them as a hostess gift so I asked her if she minded if I did the same, of course she said yes, well I suppose she had to didn't she, thanks Jane, they went down a treat for my hostesses in June.  I created many of these little bags and housed them with "Love Note" sized cards which I demonstrated at workshops and gave to my hostesses as a gift.

This is a similar design, but using cardstock for the handle instead of ribbon and we created this at the Thornbury class last Monday.
We used the lovely DSP "Cottage Wall" from the Mini Catalogue and teamed with Orchid Opulence and Rich Razzleberry cardstock.  If you like this paper, remember that it is only available while stocks last and will sadly not be making its way into the 2010/11 Idea Book & Catalogue.  Our "Vintage Vogue" flowers were stamped onto Whisper White cardstock using Rich Razzleberry ink and hand cut, adding a Silver Brad to the smaller flower and raising using a dimensional. Our handles were attached using Silver Brads.

Friday, August 6, 2010

Mums and Young Ones Class Part 2!

For our second project I decided that it would be nice to make something other than a card, and what better item than a lovely box that could contain a small gift.

I cut and scored the boxes and also cut out the tabs ready for stamping and assembly!

We used "I {heart} Hearts" for the main image, both hearts were stamped and punched out using the Large Heart and Heart to Heart punches.  We pierced a hole in the "i" of "friend" and pushed through a Pretty in Pink brad.  For the box we stamped the spiral from "Trendy Trees" randomly all over, punched a scallop border for the bottom, then stamped small flowers (from Big Bold Birthday) and punched them out with the 1/2" Circle Punch.  To finish we used the oval punch to create handles and tied a piece of 1 1/4" Striped Grosgrain ribbon in a knot.

Thursday, August 5, 2010

Mums and Young Ones Class

This week I held a one off class for "Mums and Young Ones", an opportunity for mums and grans to get creative with their young ones during the summer holidays.

So here is the card we created using "Big Bold Birthday", which is in the Stampin' Up! August Promotion, usual price is £23.95 but the 20% reduction brings its price down to a fabulous £19.16.  Remember, this offer only runs until 31st August.

So back to our card, colour combo is Rose Red, Pretty in Pink and Kraft, gorgeous, so sweet and pretty!  We used the Dot, Dot, Dot background stamp to create our sprinkles on the cake frosting and hand cut it out and used a Dimensional to raise it from our Whisper White layer.  The "make a wish" greeting was punched out using the Word Window Punch and the Pretty in Pink heart using the Small Heart Punch which can be found in the Mini Catalogue.

I was really impressed with the finished results and our youngest member of 8 years old completed the card with ease, well done Hannah, your card was beautifully put together.  As everyone enjoyed themselves I have agreed to set aside another day during the holidays to get creative so keep an eye out for more details.

Tuesday, August 3, 2010

Promotion for August

Stampin' Up! have given us "Two-step into Fabulous" the August promotion which enables you to receive 20% off select Two-Step Stampin' Sets as detailed below:

These discounted sets are:
 
Loads of Love - Normally £18.95 - Sale Price £15.16
Big Bold Birthday - Normally £23.95 - Sale Price £19.16
Trendy Trees - Normally £12.95 - Sale Price £10.36
Greenhouse Garden - Normally £22.95 - Sale Price £18.36
Something Sweet - Normally £23.95 - Sale Price £19.16
Tiny Tags - Normally £18.95 - Sale Price £15.16
Bird on a Branch - Normally £14.95 - Sale Price £11.96
 
If you would like to take advantage of this great offer, call me or email me at stampinkerry@aol.com for more details.


Saturday, July 31, 2010

Teen Girl Handbag Class

Well you may be wondering what this class is all about!  I still have spaces for the afternoon class on Thursday 5th August, 1.00-4.00pm, email me at stampinkerry@aol.com if you are interested in coming along or call me on 07717 068909.

We will be creating six cards using the punches to create cute little handbag embellishments.  There are three card designs in two colourways, Basic Black with Rich Razzleberry and Basic Black with Taken with Teal.

So here they are:

Thanks for stopping by, off to motorcross shortly so see you Monday!

Thursday, July 29, 2010

Christmas in July Class

Yesterday I held one of my day classes "Christmas in July" and I will be re-running this as an evening class, dates to follow shortly.

We made 6 delightful Christmas Cards, all using the gorgeous "Serene Snowflakes" stamp set, I really love this set it is so pretty and can be used in so many different ways.
We made six cards in total, 3 designs, 2 of each colourway, Old Olive/Chocolate Chip and Old Olive/Rich Razzleberry.  We also used the "Merry Christmas" greeting from "Season of Joy" stamp set and the Jumbo Wheel "So Swirly" along with the cute "Tiny Tags" and these all worked together lovely.  Here's a close up of the cards:


 We used Versamark and Silver Embossing Powder on some of the Snowflake images and then the "Platinum Shimmer Paint" on others, both looked equally nice.  With the Shimmer Paint you just use a dauber to apply it to the rubber stamp and then stamp onto your cardstock as you would normally.  This really gives a lovely silver shimmery image, gorgeous!

We also used embellishments from the Pretties Kit and Old Olive 5/8" Satin Ribbon.  We had a lovely afternoon crafting and it is surprising where the time goes!

Wednesday, July 28, 2010

Extravaganza Part 2....

Back to the afternoon project, but first we had the raffle, three lovely prizes won by Beryl, Ruby and Hilary, well done ladies!

We also had a prize patrol and at various times throughout the day we picked names from the hat to receive an extra prize

So onto our afternoon project, a gorgeous Concertina Album.  Our samples were all different, but here is one of mine.  I decorated the inside using "Tea Party" DSP and added photographs of a family holiday.  The beauty of this album is that you can re-create it in any colour and suit it for any occasion.

Our stamping and punches tables were busy, busy, busy and everyone was getting engrossed with their books, creating their own embellishments and designing their pages

What some lovely creations our ladies put together and what a fabulous day we had.  Thank you ladies for coming along and hope that you enjoyed it as much as Jane and I did.

We are already planning for Extravaganza #2 on Saturday 27th November 2010, so if you would like to come along for a wonderful fun day of crafting, just drop me an email at stampinkerry@aol.com to book your place.  Spaces will be allocated on a first come first served basis.

Monday, July 26, 2010

Wow, what a fab day at our Extravaganza!

So this is how it all began, our first Extravaganza Event had finally arrived and the tables were set ready for the arrival of our guests.
along with our samples tables!

and various other tables for stamping and punching!

On arrival at 10.00am for registration, our guests collected their goody bags
and project kits

and seated themselves ready for a morning of crafting

This was what we created for the morning project, in different colourways
and a close up of the Concertina Card Box that cased the co-ordinating Fresh Cut Notes
and the Fresh Cut Notes stamped using the "Fresh Cuts" stamp set


At 12.30pm we had a break for lunch and this was what our guests had in store for them, a gorgeous hand stamped lunch sack, with decorated sandwich packs and extra snacks to fill their sacks!!


I will be back tomorrow with pictures of the afternoon project and raffles and prizes so do come back and take a peak.

And in the meantime, if you would like to book your place at Extravaganza #2 on 27th November 2010, just give me a call or drop me an email to secure your space.

Saturday, July 24, 2010

Its time for the Extravaganza!!!

Today is the day of our Extravaganza, I can't believe where the time has gone, Jane and I have been so busy planning and preparing for this day and it is finally here!!

We will be taking lots of photographs throughout the day and I will be sharing these with you over the next couple of days.

Well I had best be off, don't want to be late!!!

Friday, July 23, 2010

New Class - Mums & Young Ones

I am running some extra classes throughout the school holidays, some during the day and some evening classes, below are details on one of the classes coming up in August.

****

I am holding a class on Tuesday 3rd August "Mums & Young Ones" at Whitminster Village Hall, 11.00am-1.00pm

Looking for something different to do these school holidays, come along to this class and spend a couple of hours being creative with your child, this also applies to Grans!

Stamp and create two structured make and take projects to take away with you, one of which will be a card.
All you need to bring is your favourite adhesive and a pair of scissors, all other materials are supplied.

Children must be 8 years or over.  Light refreshments included.

Adults £7.00 - Children £2.50

To book your place please call me on 07717 068909 or email me at stampinkerry@aol.com for further details.

Thursday, July 22, 2010

One of a Kind


I recently did a demonstration for a group of ladies at their W.I. evening, arranged by Julia, one of the ladies who attends my monthly card class.  I demonstrated a card using the Stampin' Up! products and introduced them to the "Kissing Technique" and then they had a turn at making their own card which was cut ready to be stamped and assembled. 

We split into two groups and created the same card in two different colourways.  We used the "One of a Kind" stamp set and my lovely Stampin' Up! mummy Jane lent me her set to help things move along a bit faster {{waves and thanks to Jane}}, after all, there were 26 ladies that evening and the majority had never made a card or used a rubber stamp before!!


Julia supervised one table and I was with the other, all of which seemed to cope wonderfully and I was impressed with the finished results.  I have to say that we were quite shattered by the end of the evening but had a really great time which is what its all about.

The other colours were more neutral.  On both cards we stamped the flower once onto Whisper White card then stamped it again and hand cut it out, layering it above the original stamped image using a dimensional.  The small flower in the middle was stamped then punched out using the 1/2" Circle Punch and a silver brad added to the centre.