Friday, February 3, 2012

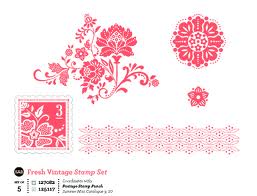
Fresh Vintage Sale a Bration Set

Fresh Vintage has to be my favourite Sale-a-bration stamp set, it is just so versatile and of course can be yours for FREE if you place an order with me for £45.

Here it is:


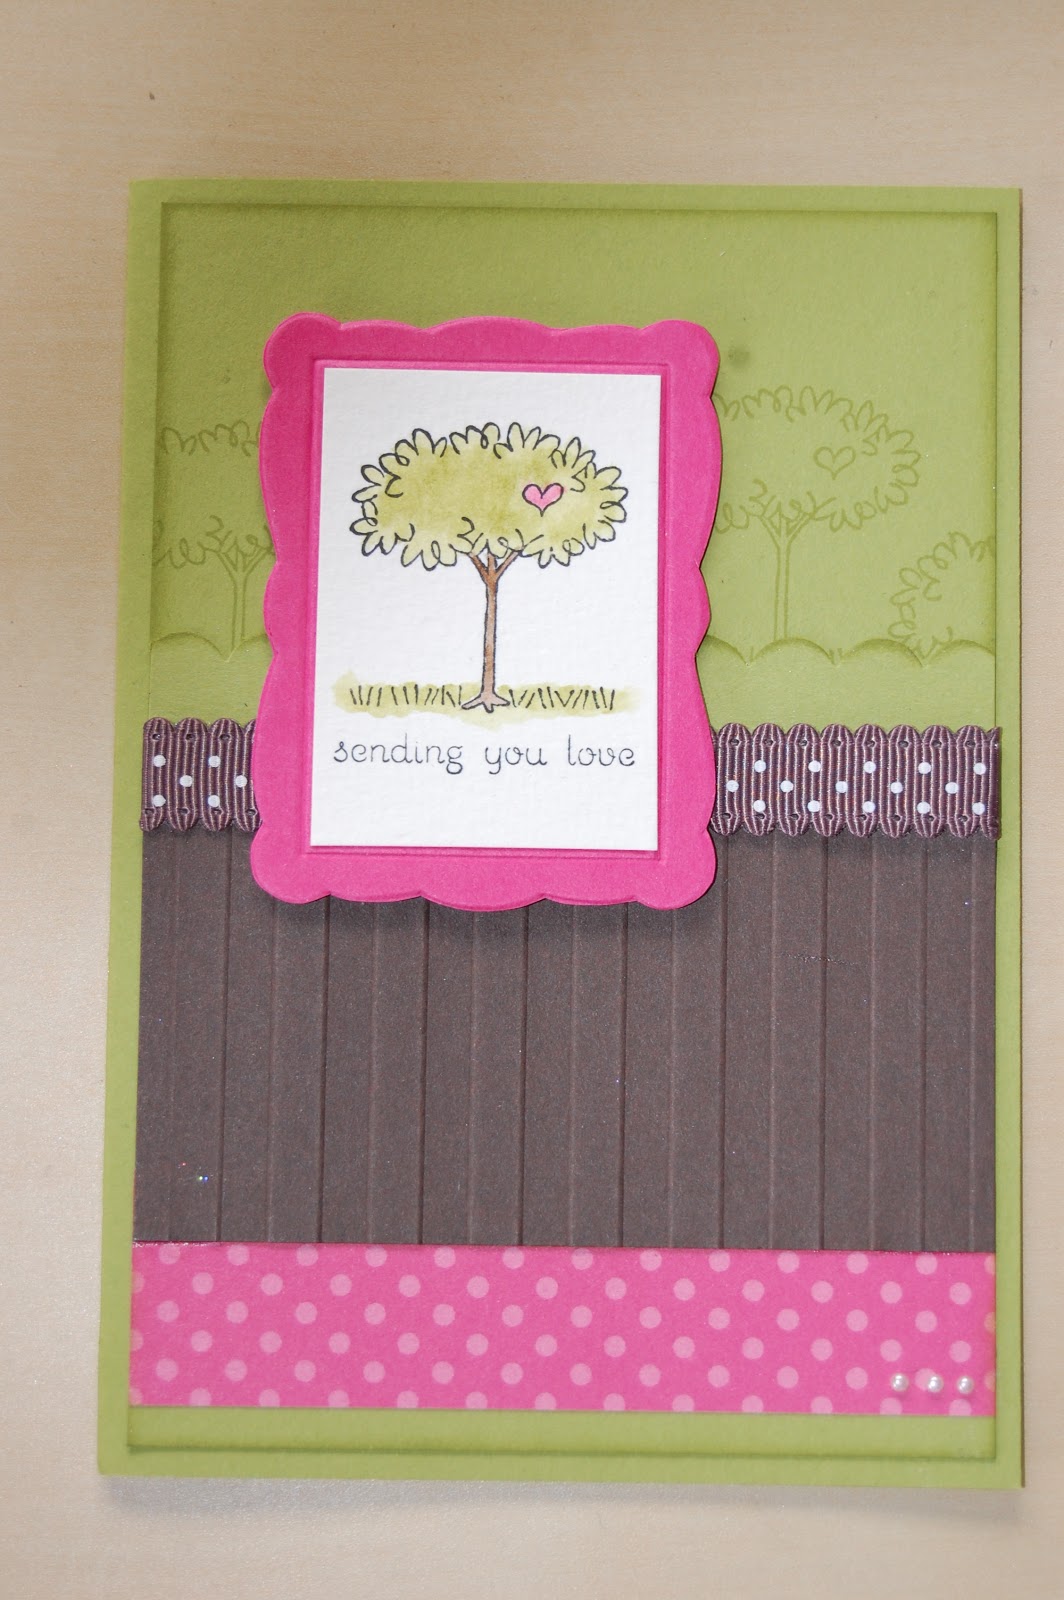
and here's a really quick card that I have made using it


My colour combo is Melon Mambo, Pool Party and Lucky Limeade teamed with Whisper White, quite bright for me but I really like it.

I have used the co-ordinating Postage Stamp Punch which layers nicely onto the 1/38" Square Punch.

The greeting is from "Petite Pairs" which works really well with the small oval punch then added an Itty Bitty Flower punched out in Lucky Limeade with a rhinestone added for a bit of bling!

Friday, January 27, 2012

The sweetest thing.....

Before I show you some Sale-a-bration samples I really should show you the final projects from the Big Shot Class, again using the Petal Cone Die, it's quite amazing what you can turn this die into!  I am sure you have seen these Ice-creams before but I think they are just so sweet and as suggested by Hazel would make a great party invitation!


Your Big Shot Machine will really take your crafting to the next step, it is an investment you won't be disappointed with.

Here we have used a couple of Embossing Folders, the Square Lattice and Vintage Wallpaper to add texture to make this ice cream look more realistic.

The Cherry on the Top is punched out from the new Glimmer Cardstock sold in a pack of two 12x12" sheets, it is really stunning and will add that touch of glam in an instant.

The greetings are all from the stamp set "For My Family" and the flag banner is die cut from the Perfect Penants Bigz Die.

Our final project was the Spice Cake Cupcake Card!

More embossing and sweetness with Cherries on top and of course an appearance of the gorgeous Spice Cake Designer Paper from the Mini Catalogue which encouraged my colour scheme of More Mustard, Pool Party and Soft Suede.  So simple yet of course, so sweet.....

........why not join me in getting the most out of your Big Shot, the next class is on Wednesday 1st February at Alveston where you can create all of these projects or at Whitminster on 14th February where we will be using another die to great some fabulous projects.

Tuesday, January 24, 2012

Let's Sale-a-Brate!

Today is the launch of Stampin' Up!'s 2012 Sale-a-bration and the promotion runs right the way through until 31st March.  This is a great offer and I am really excited to share it with you.

If you are new to Sale-a-bration this is how it works as there are different ways you can earn these free goodies plus more:

  1. Place an order for £45 between now and 31st March and you can earn yourself exclusive Stamp Sets and Designer Paper packs for FREE
  2. Be a Hostess, host a party with sales of £300 or more and choose any SAB item for FREE
  3. Join my team during SAB and not only will you get the Starter Kit for an amazing £119 but you can also choose any stamp set of any value from the current Catalogues for FREE.  This means that for £119 you will be getting products worth over £290, what amazing value that is.
There are 4 lovely stamp sets to choose from, all exclusive of course and the most delicious pack of Designer Series Paper that co-ordinates with one of the stamp sets. You can view the stamps here


********

Stampin' Up! is offering a great opportunity for you.  You may not be looking to build a business like myself, you may just want to earn a great discount on your products to help feed your hobby so here's a little bit of info to help you out:

  • Discounted Products: You will get 20% off any products you buy and if you place an order for a minimum of £150 during the first 45 days of signing up you will get an amazing 30% off. 
  • Want to earn some extra cash: There's every opporunity for you to earn yourself some extra cash, whether you want to run your own business and do house parties and classes or if you just want to show the catalogue to your friends to gain orders on a regular basis or just be your own best customer, the choice is yours and the opportunities are there for you.  You can choose the hours you want to work, as much or as little as you like, it is so flexible you can fit it around your family or part time job.
  • Free Products: You can earn yourself free stamp sets during your first 6 months as a demonstrator, get the cost of your Starter Kit back along with the opportunity of an all expenses paid trip for you and a guest to Salt Lake City, Utah in 2013, wow!!
  • Support: As your upline I will be there to provide you with any help and support you may need along the way whether you just want to be a Hobby Demonstrator or want to set up your own business.  Stampin' Up! also offer you support with guidance to help you on your way when you get started through to Regional Training Days around the country.
 If you would like to know more about signing up as a Demonstrator, call me on 01452 740532 / 07717 068909 for an informal, no obligation chat about the opportunities that there are for you


Friday, January 20, 2012

Petal Cone Die

Here is the first project from this month's Big Shot Class, we concentrated on using the Petal Cone Bigz Die and in total we created two cards and this gorgeous cone shaped box.

My colour combo was inspired by the new "Spice Cake" designer papers and consists of Soft Suede, More Mustard and Pool Party.

The greeting flag is also part of the Petal Cone die and is I have used this so much recently on my projects.

More new products here, the Spiced Paisley stamp set which is just so versatile.  Here we stamped and layered two different stamps in Soft Suede and More Mustard, punched them out using co-ordinating Circle Punches then die cut that gorgeous Scallop Circle from the Perfect Penants Bigz Die in Pool Party cardstock, just so simple but perfect for this cone.

Here is how it opens:


The Pool Party scalloped edges around the top of the cone are also die cut from the same Petal Cone die, it couldn't get easier!!

To finish we punched holes and threaded Seam Binding ribbon through to secure.

Back later with the other Big Shot projects.

Thursday, January 12, 2012

Perfect Postage

So with my previous post in mind, I set my creativity into "productive mode" and continued to follow the same sketch and produce similar but different designs with it.

This time we have a Valentine's Card, quite bright and cheery using Melon Mambo, Pool Party teamed with Crumb Cake and Whisper White.

Again I have used the Perfect Postage stamp set and this time I embossed the heart images with Melon Mambo embossing powder, it really adds an interesting feature and is so simple to achieve, just stamp with VersaMark Ink, pour powder over the image then heat with the Heat Tool, the second pictures shows this much more clearly.

The oval greeting is from "Petite Pairs" stamped in Pool Party ink and the ribbon flag greeting is from "Teeny Tiny Wishes" which is a really great set as it caters for so many different occasions.

I am really liking this set, quite versatile and great that it has the co-ordinating "Postage Stamp" punch too.


Wednesday, January 11, 2012

A New Arrival

On Monday evening, Jason's nephew's wife gave birth to "Jensen" and here is the card I have made for him.

I have been playing with the "Perfect Postage" stamps and came across a sketch which worked really well and here is how it turned out.

I am loving the new In Colours and chose Island Indigo, Pool Party and teamed it with some Crumb Cake and Whisper White.

I used another new product, the Postage Stamp Punch which of course co-ordinates with the Perfect Postage stamp set, another punch which has many uses.

The letter "J" is from the Timeless Type sizzlits set and I die cut it out using the Big Shot Machine.  I also embossed the Pool Party layer with the Stripes embossing folder, loving this one, so versatile and very classy!  I tied linen thread behind my squares to add some texture and bring in the Crumb Cake from the base card.


On the inside I used a greeting from "Bundle of Love" and stamped a Babygrow because it is sooo cute!!  I added more DSP and a Pool Party border to finish it off.


Wednesday, January 4, 2012

The new Sping Mini Catalogue is here.....

So here it is, our first ever "Spring Mini Catalogue", full of so many gorgeous new products that you will love I am sure, including the new "Simply Adorned" range of chains, charms and baubles perfect for jewellery making, home decor and of course papercrafting.  I have been so excited about this since Convention in November and being a Demonstrator I have been able to pre-order items a whole month in advance so have already been playing with some of those goodies.

Click here to go direct to the online pdf version or simply call me today and I will pop one in the post to you.


Spurred by the release of this new mini I have arranged an all day event in March, details as follows:

SPRING MINI SPECTACULAR
SATURDAY 3RD MARCH 2012
WHITMINSTER VILLAGE HALL
10.00am - 3.00pm
£35.00
INCLUDES A GOODY BAG WITH £28 OF PRODUCTS INCLUDING YOUR OWN STAMP SET TO USE ON THE DAY
LUNCH AND LIGHT REFRESHMENTS

SPACES ARE LIMITED AND AVAILABLE ON A FIRST COME, FIRST SERVED BASIS

DEPOSIT OF £18.00 REQUIRED BY 28TH JANUARY 2012
BALANCE DUE 11TH FEBRUARY 2012

Call me on 07717 068909 / 01452 740532 to book your place

Back soon with some samples to share

Tuesday, January 3, 2012

HAPPY NEW YEAR!!

I know I am a little behind schedule but here goes:

HAPPY NEW YEAR TO YOU ALL

and thank you for your support in 2011

Well I am officially back at work today, busily planning for upcoming classes and events.

I can't wait to share the new Spring Mini Catalogue with you tomorrow so stay tuned to view the online version before you get to see the real thing in person at the next class or workshop. 

If you are planning on attending the Spice Cake Desk Tidy Class at Alveston on 14th January booking closes today so don't delay in contacting me!!

Here is a sneak peak:


Friday, December 30, 2011

Not Just for Tags....

Another tag using the Two Tags Die, this time a bit more decorative and it would make the perfect partner to a co-ordinated gift wrapped present.  Isn't it nice to gift wrap those special presents with hand made tags and wrapping.  Again,  more of the previous post using "Tags till Christmas" for the Bauble image and "Polar Party" for the greeting.

So here you see the Two Tags Die is not just for Tags!  A cute little gift bag that perfectly fits two Ferrero Rocher chocolates.   This gift bag is so easy to put together, it simply uses two die cut tags which are then stuck together and folded in towards each other along the pre-scored lines to create the bag.  These would also make great name place settings too.

Gift Tag

Using the Two Tags Big Shot Die I created a cute Gift Tag and then made a pocket to encase it!  More Holly Berry Boutique Patterned Papers along with Glimmer Brads and Spotted Scallop Cherry Cobbler Ribbon.  The slim "Merry Christmas" tag was die cut using one of the Sizzlits (slim) dies from the "Lots of Tags" set.


 The "just for you" image is from the Hostess stamp set "Tagtastic" which has a very vintage feel and I love how you can cut out the centre piece and raise it using a dimensional.  Here I stamped the image in Cherry Cobbler and punched it out using the XL Oval Punch then daubed in Early Espresso ink around the edge to give a more vintage feel.

"Tagtastic" isn't available to purchase unless you are a Hostess, so why not book yourself a party, invite some friends around and earn yourself some lovely exclusive Stampin' Up! products for free or just simply host a virtual party if you don't have the room to entertain, alternatively join one of my virtual stampers/marker clubs to get your hands on exclusive hostess goodies.

Here is a close up view:

Tags Till Christmas

Sorry for the lack of posts, we have been away for Christmas and just returned this morning.  I still have a few Christmas products to share with you so thought I should do this before it is too late!!!  Of course you could always make an early start ready for next year and get crafting now!!

Another project created at the Bags, Boxes and Tags Class.  That gorgeous Ornament (Bauble) image is from the "Tags Till Christmas" stamp set which contains images that can all be punched out and used as tags.

Again we used the Holly Berry Boutique papers with co-ordinating colours of Cherry Cobbler and Wild Wasabi.

We used the Big Shot Dies Perfect Penants and Petal Cone to create the Crumb Cake Scallop Circle and Flag Banner to which we stamped a greeting using "Polar Party" Stamps.  We spritzed this with a Cherry Cobbler Marker Pen and Spritzer Tool.

We used a glimmer brad attached to a Boho Blossom flower and some of the Spotty Scallop Ribbon to create a closure for our box.
More Cherry Cobbler Boho Blossom flowers with Mini Silver Brad centres are attached to the centre of the Bauble to finish.

Sunday, December 18, 2011

Bags, Boxes and Tags Class

Last week I held a selection of Christmas classes, the "Bags, Boxes and Tags" was one of them.  The class was based on the Holly Berry Bouquet Designer Paper so our colour combo was Chocolate Chip, Cherry Cobbler and Wild Wasabi.

Here is what we created during the class, I had several samples on display with instructions and everyone chose what they wanted to make.

The first is a little gift bag that could contain anything from a couple of sweet treats, to make-up or jewellery.
The greeting is from "Polar Party" that cute little Christmas set and the ribbon tail flag was die cut with the Big Shot using the Petal Cone Die.  We stamped the greeting in Chocolate Chip ink then using the Cherry Cobbler Marker Pen spritzer over the top.


Of course some co-ordinating Spotted Scallop Ribbon is making an appearance and attaching it a Glimmer Brad, you can't appreciate just how gorgeous these are until you see one in the flesh!!

Back with some more projects soon.

Thursday, December 15, 2011

Embossing with Stripes

Don't you just love the Textured Embossing Folders that Stampin' Up! have, they give such a deep embossed texture and transform a simple piece of cardstock into something great!  This card features the new "Stripes" folder, perfect for those manly cards but still add a touch of class to any occasion.

My colour combo here is Pool Party, Island Indigo and Certainly Celery.

This cute little hippo is from the stamp set Kidoodles, the images are cute and great for colouring/watercolouring.  This card wasn't my idea, I saw it whilst blog hopping and loved how simple it was, just perfect to case for one of my 6 cards.

I used Blender Pens with the ink in the lids of the Ink Pads to colour in the hippo image.  Although these images all have a greeting attached to each stamp you can of course use a marker pen to use either the image or the greeting separately.

The lovely scallop trim circle was die cut using the Big Shot with the "Perfect Penants" die, this die also for creating Bunting!!

That lovely decorative border at the top is from the stamp set "Creative Elements" which I received at Convention, it is such a beautiful set consisting of 8 stamps.

Saturday, December 10, 2011

6 Cards Class projects

Our first card at November's 6 Cards Class was this, the idea came from Jane, we made a similar version at our Pyjama Shoe Box Swap in our rooms at Disneyland Paris.  I didn't steal the whole idea, just took the colours and sketch then added my own stamps.  Thank you Jane for the inspiration.

So I chose the stamp set "Nature Walk", a really versatile set that even works for man cards too as you can create some lovely collages with it.  We used Marker Pens to colour in the image to give a multi-coloured effect.

I have a new Marker Pen starting soon, still have a couple of spaces left so if you are interested in spreading the cost of the whole set then just get in touch.

The greeting is from "Perfect Punches" and as it's title tells, each of the greetings co-ordinate with Punches.

Thursday, December 8, 2011

Season of Joy!

"Season of Joy" is one of my all time favourite Christmas stamp sets, I love it even more as it can be used for non-Christmas cards as the Poinsettias can easily pass for flowers if using subtle colours and that swirl just has so many uses.

My colour combo here is Real Red, Old Olive and Whisper White.  That spotty scallop ribbon is making an appearance again, can you tell that I love it, the Cherry Cobbler version is even more delicious!!  Such a sweet and simple design here.
The Poinsettia's have been hand cut and layered using Dimensionals to make them stand out and on one I have added some of those cute little mini silver brads, they are just £2.95 for 200 of the little beauties and I have been using them on everything!!

Back soon with some piccies of my birthday trip to New York and Canada!

Tuesday, December 6, 2011

Watercolouring....

I just love to watercolour and we have some lovely outlined image stamps in the new Catalogue which are perfect for this.  "Easy Events" is one of those sets, lots of lovely images just waiting to be coloured in.

On this occasion I stamped the tree image with black StazOn ink onto Watercolour paper, this is to stop the bleeding when colouring in.  I used marker pens to scribble splashes of colour to the stamped image then the Aqua painters to move the colour around my image as required.  The finished effect is just as if you have painted with a brush, really soft and washy!
Ooops, there's that scallop ribbon again, this time in Chocolate Chip!!  Can you see the new "Stripes" Embossing Folder, loving that, such a useful one for all occasions.  The Designer Frame is also an embossing folder, it comes as a pair, the other is an oval with lots of dots around the edge and you are sure to see that here soon , at £7.95 for both a great bargain too!

I have a pretty busy week preparing for classes but will be back shortly to show you more!

Sunday, December 4, 2011

Sweet Snowglobe

Here is another card from my November class, this time using one of the "A La Carte" (single) Stamps "Sweet Snowglobe".  This stamp co-ordinates with the 1 3/4" Circle Punch and Sweet Treat Cups but here we simply just punched it out and gave it a bit of 3D!

We used "Serene Snowflakes" stamps to create the background on the Riding Hood Red layer, the snowflakes are just so delicate and the Kraft White Ink works perfectly on the Riding Hood Red, we also daubed around the edge.

For the Snowglobe we stamped it twice, once in Early Espresso ink then we inked it up again but this time using 4 marker pens, baja breeze (snowflakes), Riding Hood Red (house) and Old Olive and Early Espresso (trees) then punched it out using the 1 3/4" Circle Punch.  Using tombow we added adhesive to the snowflakes then poured on Dazzling Diamonds and set it to dry before layering over the Espresso image using Dimensionals.  We added some mini silver brads to the base of the Snowglobe which are hard to see from the picture.

We used the Big Shot to emboss those lovely dots onto Crumb Cake cardstock and stamped our greeting which we punched out with the Decorative Label Punch.  Don't you just love that spotty scallop ribbon, I know I do!!

Would you like to re-create this card, this stamp is only £8.95 and can still be delivered in time for you to make your Christmas cards, call or text for further information!

Saturday, December 3, 2011

Convention 2011

At Convention we have a formal Dinner and Awards evening to recognise those who have achieved throughout the year.  There were some beautiful frocks to be seen and some heels to die for!  I had planned on buying "sensible shoes" as I knew I was going to be walking the stage a few times but couldn't resist those patent Ted Baker skyscrapers and my roomies were sure that they were going to bag themselves a cheque from "Youv'e Been Framed", but fortunately for me they were unlucky this time!!!  I won some lovely gifts over the weekend for my achievements and also won the Prize Patrol too along with some sneak peak stamps that I can't share with you yet!


Here I am with the lovely Shannon West, she is such a beautiful person, so warm and natural and if you have met her I am sure you would agree.  She is wearing an apron she made with the new Timeless Portrait Fabric, we had a couple of Main Stage demonstrations from Shannon and she is a true inspiration. I am really keen to learn how to use that Sewing Machine that is sat in the corner of my Craft Room but will definitely need a bit of help to get me kick started!

There are large screens at either side of the stage so that we can see the Demonstrations in close detail, we had lots of wow's over the weekend and lots of inspiration too.  There are several large display boards full of samples and I took many many photographs to bring home with me.


Here I am with Caroline, we are sat in the Bar Area at our Hotel, looking like weve' had a couple of Martini's too many!!!

I can't wait for Convention 2012, Germany here we come!!

Monday, November 28, 2011

More from Convention

So here are my roomies, we had such fun and laughed lots, we stamped, wined, dined, shopped and had our own Pyjama Party make and takes in our room!


Here are the gifts I made for my roomies:

Inside were decorated pages with spaces for photographs and journalling to keep as a momento of our time away.

Here we are on the Main Stage


and out and about the grounds

This is where we ate on Saturday night once Convention was all finished, we had such a giggle here, something I will remember for a long time, good food and great company, what a great combination.


Do you fancy joining me at Convention 2012 in Germany, it really is so great to get together with lots of other Demonstrators, swap, share, learn and be inspired.  Being a Stampin' Up! Demonstrator is just the best, why not join my team and have the opportunity of earning some pennies in your pocket for doing something you enjoy, hours to suit you and your family!  Email or call for an informal chat about the opportunities available to you.

Sunday, November 27, 2011

I'm Back!!!!

Wow, 6 flights in 9 days, I am totally pooped, but what a ball I have had, Paris, New York, Canada and I can't wait to share it all with you.

But first things first, just a reminder that booking closes for my December Classes tomorrow, here's a couple of pictures to jog your memories:


So, these are just for the Wreath Classes on Saturday 10th December at Alveston Methodist Church and Monday 12th December at Whitminster Village Hall.

Remember there are also the other options of the Christmas Stamp a Stack (15 simple but stunning cards) and the Tags, Favours and Boxes Classes at both venues on the same dates.

Booking must close tomorrow to ensure delivery of your goodies included with the class.


Sunday, November 20, 2011

Still here, honestly!!

Hi all, apologies for my absence, I have just returned from the Stampin' Up! 2011 Convention at Disneyland Paris, the run up to going away was a little hectic with swaps, roomie gifts and class preparations and I have to say I was relieved once we were on our way knowing that everything was complete and in place for the weekend.

I shared a room at the Disney Hotel "Sequoia Lodge" with Jane, Caroline and Gill, we had such fun.  Convention is such an exciting place to be, with over 300 demonstrators from the UK, France and Germany all joining together, sharing, learning and being inspired by each other.

Here we are, and ignore the fact that I have my eye's closed, I try my hardest to keep them open and now everyone is used to taking at least 3 shots when I am in the picture just in case, on this occasion it just wasn't happening!!!

From left to right, Jane, Gilly, Me (with my eye's closed), Caroline and Hayley.

Here we have just signed in for Convention, collected our Bags complete with 2 Stamp sets, Lanyards, Award Pins and more, waiting impatiently to go into the Momento Mall to shop for all our Stampin' Up! Branded Logo goodies!


After the excitement of the Momento Mall we began our swapping, here is one of the designs I put together, something we made a my classes earlier this month, it uses the beautiful stamp set "Everything Eleanor" which I just adore, for the background I used the bleaching technique.


Do you recognise this lovely lady, our guest Presenter, of course, it's Liz Shannon up on stage wowing us with her creations!

During the day we do lots of creating, learning and sharing, we also get to have our very own "Make and Take" sessions too:


That's all for today, I am off to New York tomorrow to celebrate my 40th Birthday so I have lots of unpacking and re-packing to do!  I will try to share some more convention photo's with you before I go!


Friday, November 4, 2011

In August we drove over to France in the Motorhome to spend a few days away sightseeing and relaxing, and after not having spent any time in the motorhome away racing this year, due to Jack breaking his leg, it was nice to be in there again, it's our little home from home!

During our stay in France we drove a lot, stopping off at places we liked and we packed so much into our little adventure.  Of course my camera was with me all the time so I took lots of photographs to share when we got home.

Once place we wanted to go to was the Abbey of the Mont St. Michel, the most amazing


We used a base colour of Crumb Cake and teamed it with Always Artichoke and Not Quite Navy which co-ordinated with our Springtime Vintage Paper (now retired). The new Lace Ribbon Punch made a beautiful border down the left side of the layout and we punched out Whisper White circles and stuck them behind to make the border stand out a little.

We used the Big Shot to create our title with the "Timeless Type" Sizzlits Dies, it is just so quick and easy to cut them out. The "of" was stamped using "Just Perfect" alphabet stamps which are also really great for personalising your cards too!

The Not Quite Navy flowers were something Amanda Fowler showed us on a swap she created and I just love them. They are created using the 5 Petal Flower punch and then one of the Bitty Punches for the centres attached with a brad. The large River Rock flower to the bottom right was die cut using the "Fun Flowers" Bigz L die with the Big Shot Machine.

Those pretty little butterflies in the top left corner were stamped using "Clearly for You" stamps in Crumb Cake ink so we had a tone on tone effect.

Thursday, November 3, 2011

Scrapbooking with Bunting!

Here is one of the layouts we created at October's Scrapbook Class.  Mine is lacking a title but I will get around to it at some point soon!

Lots of stamping and punching out on this one with some hand cuttnig too, I kept them very busy!  We used the new stamp set Penant Parade and also the lovely flower set called Printed Petals with a colour combo of Baja Breeze, Not Quite Navy and Cherry Cobbler.  The papers are now retired but we used a selection from Springtime Vintage, I am a little late in showing these!!


We used the fab Penant Builder Punch to punch out our bunting, it just makes such light work of it then added some small circle elements which are also in the Penant Parade stamp set.

If you would like to create some Scrapbook Pages to preserve your memories, why not book into one of my classes, the next one is Tuesday 15th November at Whitminster Village Hall, 7.00pm and we create 3 layouts at this class.

Tuesday, November 1, 2011

New Promotion - "It's Good to be the Hostess"

It’s Good to Be the Hostess Promotion


Get even more FREE products when you host a qualifying Stampin’ Up! workshop 1 November – 15 December 2011.

Get the Paisley Petals Set and coordinating Paisley Petals Designer Series Paper for FREE—up to a £33.90 value—when you host a £300 workshop! This brand-new stamp set and Designer Series Paper are in addition to all the other exciting and generous benefits you get as a Stampin’ Up! hostess.