Thursday, March 29, 2012

All About the Boys!

Last Saturday I held my "All About The Boys" Class and I was joined by 15 lovely ladies.

During the day we created 10 cards with a box to put them in, all for the men in our lives!

Here are the gifts I made for everyone, now bearing in mind the cards were all for men, the table treats just had to be for the girls!

This bonnet was created using a brad pot and I decorated it using the Scallop Circle Die for the base, Circles#2 die for the top circle, both of which I ran through the Big Shot with the Vintage Wallpaper Embossing Folder.  The gorgeous flower on the front was die cut using the "Blossom Party" Bigz die which is in the Spring Mini Catalogue and remember items from this mini are only available until the end of April.

This is a little chocolate treat to keep everyone's sugar levels up whilst they are busy crafting!

I used this Top Note die for the main wrapper then again the Blossom Party for the cute daisy.  The flag banner is from the Petal Cone Die.  The papers are from Spice Cake which we used on all of our cards during the day, again this is in the Spring Mini catalogue.

Everyone had a kit bag and also a goody bag which you can see below, decorated again to keep in with the colour theme.


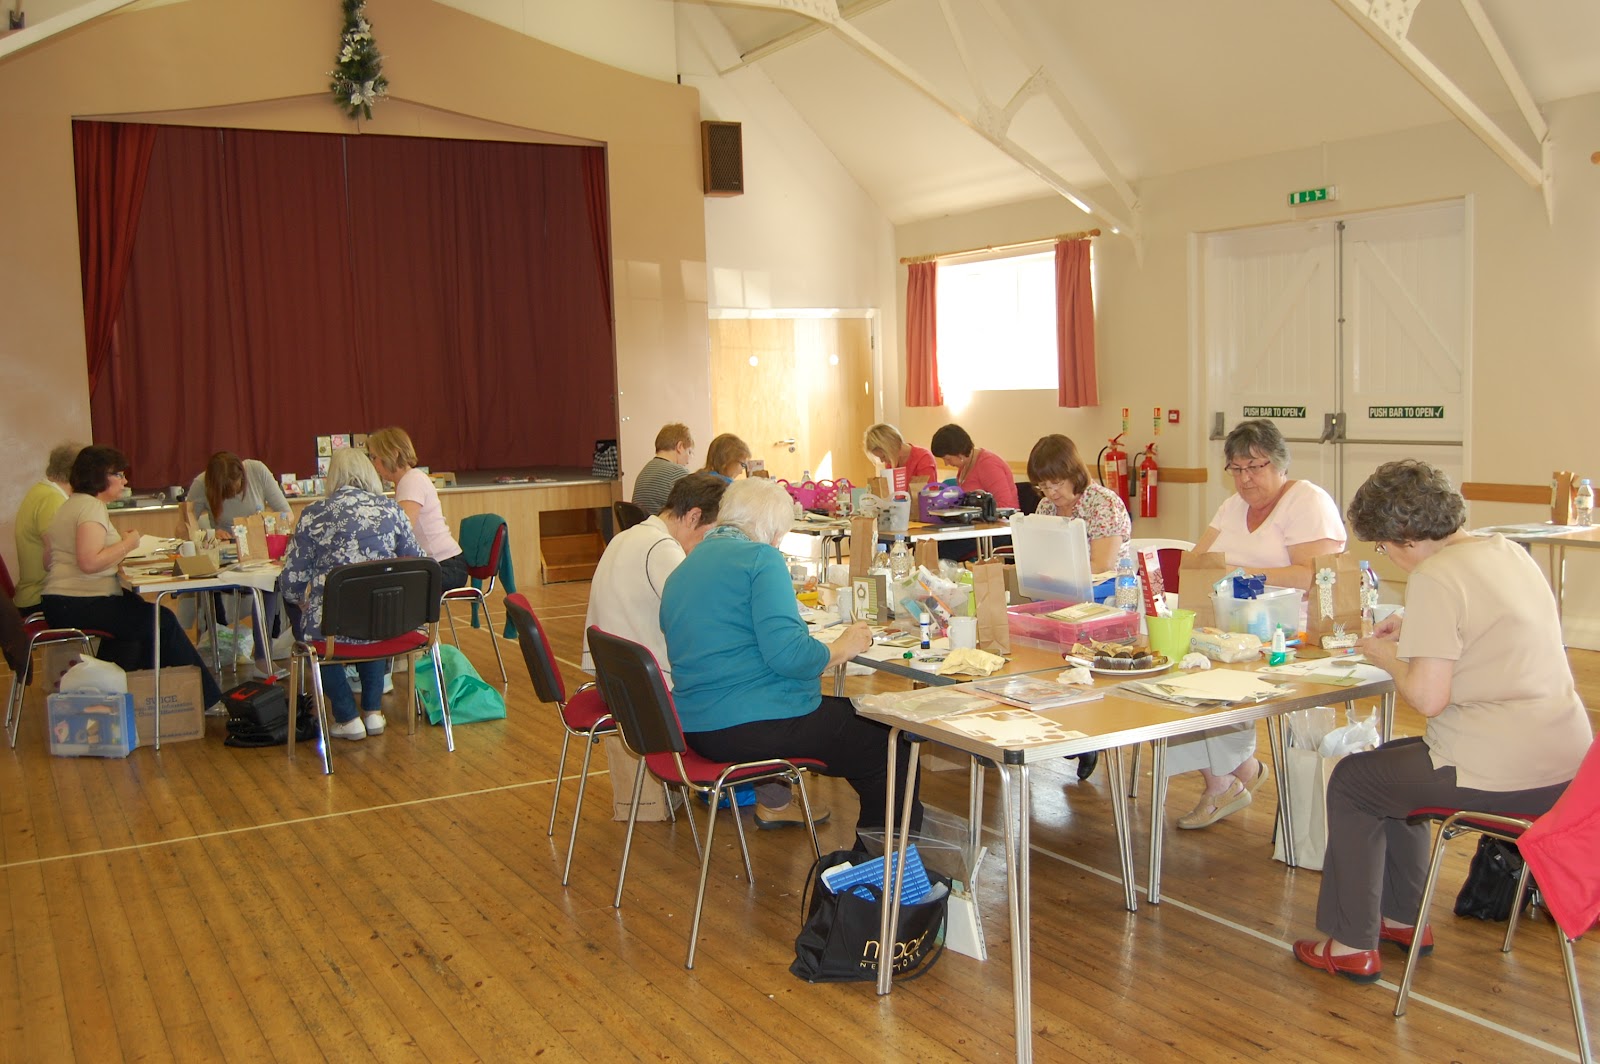
And here is everyone, busy crafting!


Back soon with the cards that we made!!

Sunday, March 25, 2012

More "Two Tags" projects

The final project at the Big Shot Class, using the "Two Tags" die was this cute little treat holder.

As you can see we cut two of the narrow tags then created a box base to adhere them to, so simple and quick to put together.

I love how the Scallop Circle Punch co-ordinates with this tag.

The Happy Birthday circles are from a Hostess Set called "Happiest Birthday Wishes".  Why not host a party or join one of my Virtual Clubs to earn this stamp set for free, new clubs starting in May, details to follow.

We stamped the beautiful swirl image from "Creative Elements" in Concorde Crush ink on the to Crumb Cake tag then stamped the Butterfly in the same colour and hand cut it out, layering with a Dimensional as if it were flying away!!

A really sweet project that uses minimal cardstock and time and will fit some lovely little chocolate treat or gift, mine has Milka Mini chocolate bars inside wrapped with a small cello bag.

Friday, March 23, 2012

I had seen on my blog hopping travels an Easel Card made using the Two Tags die and wanted to have a go at it myself as it looked so pretty and delicate.

Again I used the same colours as my Bookmark Card, Wisteria Wonder, Concorde Crush and Very Vanilla.

It looks complicated to put together but is really simple and just requires a folded piece of Very Vanilla, positioned just below the cut line on the bottom of the tag outline to create a folded edge rather than cutting two separate tags.

My Big Shot Class is designed to help you get the most use out of your dies and believe me, this Two Tags Die is definitely not just for cutting out tags, it has many uses and can even be used as the base for a small box!

We did some embossing on the Big Shot using the Perfect Polka Dots folder, I love how deep the impressions are on the Stampin' Up! folders, and how a simple piece of cardstock is transformed into a textured layer with simplicity.

Don't you just love this butterfly!

Back with the final project very soon.

I have an all day event tomorrow "All For The Boys" so will hope to have some pictures to share with you too!

Tuesday, March 20, 2012

Big Shot Class - Two Tags

At this month's Big Shot Class we used the "Two Tags" die to create our projects.  This die is just so versatile and there are so many different ways of using it other than for tags.

We make 3 projects at this class, usually 2 cards and a 3D item and the colour combo we used is Wisteria Wonder, Concorde Crush, Very Vanilla and Crumb Cake.


The first project was a bookmark card which would make a lovely gift in itself.  The stamps used are from "Creative Elements" and this set has a gorgeous swirly background stamp which we stamped onto our Wisteria Wonder layer in the same colour ink.  The set also has a beautiful butterfly and 6 lovely stamps, including a flower that can be decoupaged.  You will find the set on Page 67 of the Idea Book & Catalogue.

The ribbons also co-ordinate with the card, and I used Wisteria Wonder Ruffled and Concorde Crush Stitched Poly on this one.  We stamped more images from "Creative Elements" onto the bookmark.  The greeting is from a Hostess set called "Happiest Birthday Wishes".  The stripy paper is from the In Colour stack, you get a whole pad of 40 sheets of double sided patterned paper for an amazing £19.50, it just lasts and lasts and has so many uses.
 
We used the "Blossom Party" die with the Big Shot to die cut the Wisteria Wonder flower then layered with a 1/2" Pear Pizzazz circle and a gorgeous Concorde Crush Glimmer Brad.

If you would like to get your hands on the products used to create this card, just email me at stampinkerry@aol.com for more information or why not host a party and earn them for free!

Back tomorrow with the other projects.

Monday, March 19, 2012

For Mother's Day

Morning all, after a frosty start the sun is now shining here, fingers crossed it will stay!  Below is the card I made for my Mum for Mother's Day yesterday, a very soft and subtle colour combo of Crumb Cake, Pink Pirouette and Very Vanilla.

I used stamps from the set "Everything Eleanor" which I adore, so what better choice than to use them on a card for my mum.

The Designer Papers are from the "First Edition" speciality pack and you get a whole 24 sheets in this set, they are so versatile and look lovely when you stamp over them.

My greeting is from "Teeny Tiny Wishes" which has 24 greetings in this set to suit all different occasions, you can find it on Page 86 of the Idea Book & Catalogue.
 Although difficult to see in the photograph I have used the little flourish stamp from "Easter Blossoms" on the Pink Pirouette layer then daubed around the edge in Crumb Cake ink.  I also did a little Spritzing which I seem to be doing on everything lately!
To finish I added some Pearls to the centres of the flowers and a bow tied with Very Vanilla satin ribbon.

Wednesday, March 14, 2012

Fresh Vintage Scallop Style

At February's Big Shot Class we used the Scallop Square die in three different ways as shown below and added some "Fresh Vintage" with the Sale-a-bration stamps and co-ordinating papers.

It's not too late to get your free Sale-a-bration goodies, just place an order for £45 before the end of the March to qualify for any of the 4 exclusive stamp sets or choose the Everyday Enchantment Designer Series Papers.

You can also earn free Sale-a-bration items when you host a Party, give me a call today and we can pencil in a date for an evening of fun, inspiration and creativity!  If you don't have the room to host a party, why not have a "Virtual" party, you can still earn your free goodies, just call me for more information.

Back to the samples:


A simple but effective card, using not only the Scallop Square die but the Two Tags die onto which we stamped that gorgeous flower burst using the Marker Pens to colour straight onto the rubber giving a multi-coloured finish.  The greeting is from "Elementary Elegance", another Sale-a-bration set.


We always make a 3D item at the Big Shot Class and this die is perfect for making little gift pouches for holding special gifts or chocolate treats.  Again more Sale-a-bration stamps and papers that co-ordinate beautifully, I love that Postage Stamp image and it is designed to be used with the Postage Stamp Punch from the Spring Mini.


Our final project of the evening was the Scallop Square Card, created by folding your card and placing the fold just below the top of the cut line on the scallop square, thus creating an uncut edge, something you may need to see in action to understand but really quite straightforward.

The colours in the papers are gorgeous, a mixture of new and older In Colours and they work great together, I will be so sad to see these go at the end of the month.  Again the greeting from "Elementary Elegance" along with a butterfly from the same set.

Don't forget that if you are thinking about signing up and buying the Starter Kit, don't think for too much longer as up to 31st March you will get any extra Stamp Set of your choice for free, so your kit contents will be valued at over £280 for a cost of just £119, it is such great value, too great to be missed, call for more information.

Friday, March 9, 2012

Fruit and Flowers Layout

I have so many things to show you but just not enough time to catch up with myself at the moment, so here is a layout from a previous Scrapbooking Class, following on the theme of the Fruit and Flowers stamps that we used at my all day event.  The inspiration from this one came from the front of the Mini Catalogue, I just rotated the sketch to work with my photo.

I can't tell you enough (well those of you how see me at workshops and classes will know this as I am always harping on about it) how much I am loving the new In Colours, they are just so great with each other and work well with so many others too.

These products are from the Berry Blossom suite, the papers are gorgeous and the stamps are very versatile.  We used two of the Big Shot dies for this layout, the Blossom Party which is the Calypso Coral flower at the top and the Fun Flowers XL die which is the Wisteria Wonder one to the bottom.

These papers are quite bright for me, I am a subtles girl at heart,  so I like that the Crumb Cake base tones everything down a little bringing in a bit of neutral ground to which we spritzed in the same colour although not visible on the photograph.  We added glimmer brads and pearls to the centres of the flowers and I was pleased with the finished result, the photograph doesn't do those 3D flowers any justice, they are just so pretty and cut in no time with the Big Shot.

Thursday, March 8, 2012

Finally, the Spring Mini Spectacular....

After a busy week so far, I can finally share with you the projects we created last Saturday at my Sping Mini Spectacular.  I was joined by 25 ladies for a fun packed day of creativity.

Here is the room before everyone arrived:


Everyone had a goody bag and some table treats, all decorated with the Fruit and Flowers stamps and co-ordinating Berry Blossom papers.


We had three sessions where we created the following projects:

Card Carrier with 2 Cards

Magazine File with 2 Cards 


Note Pad Holder

An Exploding Box/Card 

My mum helped me out during the day and prepared a huge buffet lunch for everyone and I am really grateful to her for her support so thank you mum, lots of people have commented on the wonderful food they had.  Laura my downline also offered to come along and help supervise the sessions which was much appreciated.  I also need to thank Jo Dumbleton for letting me teach the Magazine File which was just what I was looking for to hold my cards.

From the feedback I have received, the day was enjoyed by all and ran very smoothly.  I really enjoyed the day myself and can't wait to start planning the next one so if you think you might like to come along and are not on my mailing list please do get in touch.