Saturday, July 31, 2010

Teen Girl Handbag Class

Well you may be wondering what this class is all about!  I still have spaces for the afternoon class on Thursday 5th August, 1.00-4.00pm, email me at stampinkerry@aol.com if you are interested in coming along or call me on 07717 068909.

We will be creating six cards using the punches to create cute little handbag embellishments.  There are three card designs in two colourways, Basic Black with Rich Razzleberry and Basic Black with Taken with Teal.

So here they are:

Thanks for stopping by, off to motorcross shortly so see you Monday!

Thursday, July 29, 2010

Christmas in July Class

Yesterday I held one of my day classes "Christmas in July" and I will be re-running this as an evening class, dates to follow shortly.

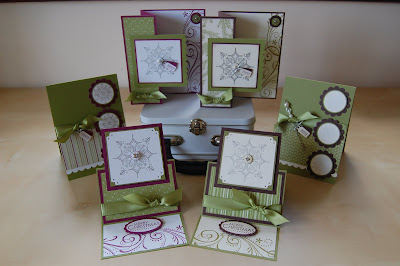
We made 6 delightful Christmas Cards, all using the gorgeous "Serene Snowflakes" stamp set, I really love this set it is so pretty and can be used in so many different ways.
We made six cards in total, 3 designs, 2 of each colourway, Old Olive/Chocolate Chip and Old Olive/Rich Razzleberry.  We also used the "Merry Christmas" greeting from "Season of Joy" stamp set and the Jumbo Wheel "So Swirly" along with the cute "Tiny Tags" and these all worked together lovely.  Here's a close up of the cards:


 We used Versamark and Silver Embossing Powder on some of the Snowflake images and then the "Platinum Shimmer Paint" on others, both looked equally nice.  With the Shimmer Paint you just use a dauber to apply it to the rubber stamp and then stamp onto your cardstock as you would normally.  This really gives a lovely silver shimmery image, gorgeous!

We also used embellishments from the Pretties Kit and Old Olive 5/8" Satin Ribbon.  We had a lovely afternoon crafting and it is surprising where the time goes!

Wednesday, July 28, 2010

Extravaganza Part 2....

Back to the afternoon project, but first we had the raffle, three lovely prizes won by Beryl, Ruby and Hilary, well done ladies!

We also had a prize patrol and at various times throughout the day we picked names from the hat to receive an extra prize

So onto our afternoon project, a gorgeous Concertina Album.  Our samples were all different, but here is one of mine.  I decorated the inside using "Tea Party" DSP and added photographs of a family holiday.  The beauty of this album is that you can re-create it in any colour and suit it for any occasion.

Our stamping and punches tables were busy, busy, busy and everyone was getting engrossed with their books, creating their own embellishments and designing their pages

What some lovely creations our ladies put together and what a fabulous day we had.  Thank you ladies for coming along and hope that you enjoyed it as much as Jane and I did.

We are already planning for Extravaganza #2 on Saturday 27th November 2010, so if you would like to come along for a wonderful fun day of crafting, just drop me an email at stampinkerry@aol.com to book your place.  Spaces will be allocated on a first come first served basis.

Monday, July 26, 2010

Wow, what a fab day at our Extravaganza!

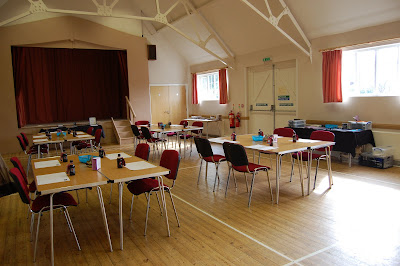
So this is how it all began, our first Extravaganza Event had finally arrived and the tables were set ready for the arrival of our guests.
along with our samples tables!

and various other tables for stamping and punching!

On arrival at 10.00am for registration, our guests collected their goody bags
and project kits

and seated themselves ready for a morning of crafting

This was what we created for the morning project, in different colourways
and a close up of the Concertina Card Box that cased the co-ordinating Fresh Cut Notes
and the Fresh Cut Notes stamped using the "Fresh Cuts" stamp set


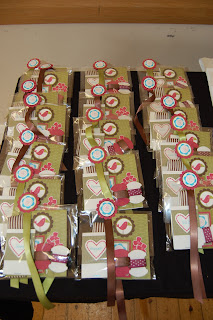
At 12.30pm we had a break for lunch and this was what our guests had in store for them, a gorgeous hand stamped lunch sack, with decorated sandwich packs and extra snacks to fill their sacks!!


I will be back tomorrow with pictures of the afternoon project and raffles and prizes so do come back and take a peak.

And in the meantime, if you would like to book your place at Extravaganza #2 on 27th November 2010, just give me a call or drop me an email to secure your space.

Saturday, July 24, 2010

Its time for the Extravaganza!!!

Today is the day of our Extravaganza, I can't believe where the time has gone, Jane and I have been so busy planning and preparing for this day and it is finally here!!

We will be taking lots of photographs throughout the day and I will be sharing these with you over the next couple of days.

Well I had best be off, don't want to be late!!!

Friday, July 23, 2010

New Class - Mums & Young Ones

I am running some extra classes throughout the school holidays, some during the day and some evening classes, below are details on one of the classes coming up in August.

****

I am holding a class on Tuesday 3rd August "Mums & Young Ones" at Whitminster Village Hall, 11.00am-1.00pm

Looking for something different to do these school holidays, come along to this class and spend a couple of hours being creative with your child, this also applies to Grans!

Stamp and create two structured make and take projects to take away with you, one of which will be a card.
All you need to bring is your favourite adhesive and a pair of scissors, all other materials are supplied.

Children must be 8 years or over.  Light refreshments included.

Adults £7.00 - Children £2.50

To book your place please call me on 07717 068909 or email me at stampinkerry@aol.com for further details.

Thursday, July 22, 2010

One of a Kind


I recently did a demonstration for a group of ladies at their W.I. evening, arranged by Julia, one of the ladies who attends my monthly card class.  I demonstrated a card using the Stampin' Up! products and introduced them to the "Kissing Technique" and then they had a turn at making their own card which was cut ready to be stamped and assembled. 

We split into two groups and created the same card in two different colourways.  We used the "One of a Kind" stamp set and my lovely Stampin' Up! mummy Jane lent me her set to help things move along a bit faster {{waves and thanks to Jane}}, after all, there were 26 ladies that evening and the majority had never made a card or used a rubber stamp before!!


Julia supervised one table and I was with the other, all of which seemed to cope wonderfully and I was impressed with the finished results.  I have to say that we were quite shattered by the end of the evening but had a really great time which is what its all about.

The other colours were more neutral.  On both cards we stamped the flower once onto Whisper White card then stamped it again and hand cut it out, layering it above the original stamped image using a dimensional.  The small flower in the middle was stamped then punched out using the 1/2" Circle Punch and a silver brad added to the centre.

Tuesday, July 20, 2010

Mini Thank You's

Yet again I have been creating Thank You's and this was my creation for the last batch that went through the assembly line!  I was inspired on this one by a card we created at a past team gathering, I loved the simplicity of using the Square Scallop Punch to showcase the gorgeous papers in the "Cottage Wall" designer series paper pack.  The stamps were from "Say it with Scallops" which co-ordinates perfectly with the Square Scallop Punch.  I have also used the new "Small Heart Punch" which you can find in the Mini Catalogue.
Remember that these papers won't be around for much longer, they will definitely not be running through to the 2010/11 Idea Book & Catalogue, so if you like what you see, don't delay and be disappointed, place your order while stocks are still available.

Monday, July 19, 2010

Class Make and Take


This was our second make and take at Whitminster's class this month.  The greeting I chose would make this card suitable to give at the birth of a child or alternatively, by changing this greeting the card would be suitable for a number of occasions.  The colours used were Barely Banana, Pretty in Pink and Certainly Celery along with Whisper White.
We used the lovely "En Francais" stamp with Pretty in Pink ink to create our background on the back Whisper White layer and mounted this onto Pretty in Pink cardstock.  The DSP is from the "Tea Party" pack, it is so pretty, I love the soft pastel colours and of course the 12x12" sheets are double sided so you have lots of options to choose from.

We punched the bird and branch from the "Two-step" Bird Punch and stamped with the "Fine Flourish" stamp in Certainly Celery ink.  The greeting was from the "Nursery Necessities" stamp set.  We used the Daubers to ink around most of the layers to soften the edges.

******

I am holding some extra classes in my craft room during the school holidays, numbers will be limited to six, details to follow shortly.

Thanks for stopping by, happy stamping!

Friday, July 16, 2010

Fox & Friends

This is one of the cards we made at Whitminster's class this month.  A great card for the younger ones!
Our technique for this month was using the "Stamp-a-ma-jig".  We used this on our card to stack our animals on top of one another and I think everyone got the hang of it eventually!  The Stamp-a-ma-jig is such a great tool, it allows for easy alignment of images and once you have used it a couple of times its just like riding a bike!!

I just love these colours Old Olive, Chocolate Chip and Taken with Teal, such a fab combination, I will be sad to see Taken with Teal disappear in October but I know we are being graced with some wonderful colours in place of those we are saying goodbye to.

I have been trying to use my wheels a little more recently as the effect they give is so stunning yet simple.  This one here is "So Swirly" and it is probably my favourite, this is a Jumbo wheel and we have used only half the image on this card to leave room for the greeting.  The "Happy Birthday" on the outside of the card was stamped using "Basic Phrases" and the Stamp-a-ma-jig.

I will be back with the second project shortly, so stay tuned!

Tuesday, July 13, 2010

Inspirin' Inking Quarterly Team Meeting Challenge

At June's Quarterly Team Meeting Amanda's Challenge was to decorate a glass tumbler into something that we could give to a hostess at a home workshop.  Here is my creation, a decorated glass filled with some lovely "Sweet Pea Stitched Felt" and some co-ordinating ribbons.    I cut a square of DSP from the "Sweet Pea Stack", cut it in half diagonally which left me with two triangles.  I only needed one of these and added strips punched from the Scallop Border Punch around the edges to create a bird house effect.  I punched a whole near the top using the 1 3/8" Circle Punch and encased it with a Scallop Circle with the centre punched out.  I stamped onto a piece of Window Sheet using the Dot, Dot, Dot stamp and StazOn ink to create my dotty window.  My bird and branch were punched from the "Two-step Bird Punch" and I stamped over the bird with the foliage stamp from the "Vintage Vogue" stamp set using VersaMark ink.  I adhered these pieces then tied a bow using the gorgeous Old Olive 5/8" Satin Ribbon and finished with a flower and leaf from the "Stitched Felt" pack.  My cello bag was tied with Chocolate Chip 5/8" Satin Ribbon and I added some tags punched out using the Medium Jewelery Tag Punch then to finish I attached these on with a piece of Linen Thread.

Sunday, July 11, 2010

Inspirin' Inkies Quarterly Team Meeting

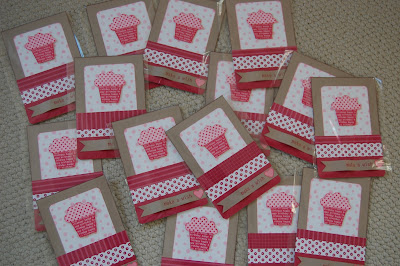
As you will know from previous posts, when we have our Inspirin' Inkin Quarterly Team Meeting us Demo's prepare swaps for each other.  These are all the pieces I have cut and stamped ready for the assembly line for my swaps!

I have been using "Big Bold Birthday" on some recent projects so decided to use it again for my swaps.  I chose some of my favourite colours, Rose Red, Pretty in Pink and Kraft and teamed with Whisper White.  I am so glad that these colours will be staying in October when the renovation happens, although Kraft is being re-named as "Crumb Cake" which may be confusing for a while!

So here is my finished swap:
and here they are all together!

We had a fab day crafting, laughing, learning, and winning prizes! We also have challenges and I will be posting my creation very shortly.

Being an Independant Demonstrator for Stampin' Up! really is great fun, I have met some fabulous people since joining.  Whether you would like to start your own business, be it large or small, or would just like to benefit from the discounts and would like more information about signing up to be a Demonstrator and joining my team then just email me at stampinkerry@aol.com for more details.

Thank you for dropping by

Wednesday, July 7, 2010

"Making Cards & Gifts" Class at Thornbury

At the new "Making Cards & Gifts" class in Thornbury we will create two projects, one a 3D item and the other a card.  For this month I chose "Fox & Friends" as I thought it would be nice to create a card for the younger generation.  I did also have an "older generation" option that was available.

* Check out my Special Offer below using some of these products *

I really love the "So Swirly" wheel used here for the background, we inked up the wheel with Chocolate Chip ink and this was the result on the same coloured cardstock, quite pretty don't you think.  The fox image is from "Fox & Friends" stamp set and the greeting from "Big Bold Birthday" which was the set we used on our 3D Make and Take.  The hearts were punched using the "Small Heart Punch" and a layer of "Crystal Effects" added to give a lovely shiny finish.  We punched out our stamped fox image using the large and small tag punches and added a piece of 1/4" Grosgrain Chocolate Chip ribbon.


* Special Offer *

Place an order between now and 14th July for £30 (plus p&p) that includes either the "Fox & Friends" Stamp Set or "Big Bold Birthday" and get a
Spool of 1/4" Grosgrain Ribbon for FREE*

Click on the Catalogues to the right of my blog to view these products on Pages 11 of the Mini and Page 35 of the Main Catalogue

* Your choice of colour

Just email your order to me at stampinkerry@aol.com and mention my "Fox & Friends" Offer to qualify.  Have your order shipped direct to your door for just £3.95 or collect from your next class.


Tuesday, July 6, 2010

Making Cards & Gifts Class at Turnberries, Thornbury

This was our first make and take project, a Gable Box, the perfect little gift box that can hold a variety of treats and surprises!

We used the "Big Bold Birthday" stamp set which suits all ages, male and female, colour dependant!  Obviously this one is very girly but could be re-created in more masculine colours and still look as fab.  These make great "Teacher" gifts too, just throw a few choccies inside and hey presto, quite easy to put together too.

Our colour combo is Rose Red, Pretty in Pink and Chocolate Chip with Very Vanilla as our stamping base.  I love how those flowers fit inside the 1/2" Circle Punch, so sweet and simple.

If you would like to join the class next month, we are meeting on Monday 2nd August at 7.00pm, just give me a call to book your place.

Saturday, July 3, 2010

Birthday Friend

I have been wanting to use these two colours for a couple of weeks, inspired by a packet of crisps for the colour combo!!!  Rich Razzleberry teamed with Tempting Turquoise, just lovely.  It is my daughter's friends birthday today, "Happy Birthday Louise" so I decided to try the colours out on her card and I have to say I really loved the results.  The picture really does not do it any justice!

I have used "I {heart} Hearts" for the main stamp images and then added some tags using the "Tiny Tags" stamp set and Medium Jewelry Tag Punch.  The "Friend" heart is layered with a Tempting Turquoise heart which has been punched using the Heart Punch.  I added some Polka Dot Rich Razzleberry Ribbon to finish.

I layered up my hearts using Dimensionals to make them stand out and added some punched circles to the right hand side of the card using the 1/4 and 1/8" circle punches.

Thursday, July 1, 2010

New Class Commencing at Thornbury

I have a new class "Making Cards & Gifts" starting on Monday 5th July at Turnberrie's Community Centre in Thornbury, South Glos, 7.00pm-9.00pm, if you are local and interested in coming along drop me an email to stampinkerry@aol.com for further details.

Here is a sneaky peak at our two make and take projects, one is a 3D creation!


This class will cost £8.00 which will include your two make and takes.  There will be free flowing tea, coffee and biscuits and lots of inspiration and advice.  There will also be a raffle too.