Friday, December 30, 2011

Not Just for Tags....

Another tag using the Two Tags Die, this time a bit more decorative and it would make the perfect partner to a co-ordinated gift wrapped present.  Isn't it nice to gift wrap those special presents with hand made tags and wrapping.  Again,  more of the previous post using "Tags till Christmas" for the Bauble image and "Polar Party" for the greeting.

So here you see the Two Tags Die is not just for Tags!  A cute little gift bag that perfectly fits two Ferrero Rocher chocolates.   This gift bag is so easy to put together, it simply uses two die cut tags which are then stuck together and folded in towards each other along the pre-scored lines to create the bag.  These would also make great name place settings too.

Gift Tag

Using the Two Tags Big Shot Die I created a cute Gift Tag and then made a pocket to encase it!  More Holly Berry Boutique Patterned Papers along with Glimmer Brads and Spotted Scallop Cherry Cobbler Ribbon.  The slim "Merry Christmas" tag was die cut using one of the Sizzlits (slim) dies from the "Lots of Tags" set.


 The "just for you" image is from the Hostess stamp set "Tagtastic" which has a very vintage feel and I love how you can cut out the centre piece and raise it using a dimensional.  Here I stamped the image in Cherry Cobbler and punched it out using the XL Oval Punch then daubed in Early Espresso ink around the edge to give a more vintage feel.

"Tagtastic" isn't available to purchase unless you are a Hostess, so why not book yourself a party, invite some friends around and earn yourself some lovely exclusive Stampin' Up! products for free or just simply host a virtual party if you don't have the room to entertain, alternatively join one of my virtual stampers/marker clubs to get your hands on exclusive hostess goodies.

Here is a close up view:

Tags Till Christmas

Sorry for the lack of posts, we have been away for Christmas and just returned this morning.  I still have a few Christmas products to share with you so thought I should do this before it is too late!!!  Of course you could always make an early start ready for next year and get crafting now!!

Another project created at the Bags, Boxes and Tags Class.  That gorgeous Ornament (Bauble) image is from the "Tags Till Christmas" stamp set which contains images that can all be punched out and used as tags.

Again we used the Holly Berry Boutique papers with co-ordinating colours of Cherry Cobbler and Wild Wasabi.

We used the Big Shot Dies Perfect Penants and Petal Cone to create the Crumb Cake Scallop Circle and Flag Banner to which we stamped a greeting using "Polar Party" Stamps.  We spritzed this with a Cherry Cobbler Marker Pen and Spritzer Tool.

We used a glimmer brad attached to a Boho Blossom flower and some of the Spotty Scallop Ribbon to create a closure for our box.
More Cherry Cobbler Boho Blossom flowers with Mini Silver Brad centres are attached to the centre of the Bauble to finish.

Sunday, December 18, 2011

Bags, Boxes and Tags Class

Last week I held a selection of Christmas classes, the "Bags, Boxes and Tags" was one of them.  The class was based on the Holly Berry Bouquet Designer Paper so our colour combo was Chocolate Chip, Cherry Cobbler and Wild Wasabi.

Here is what we created during the class, I had several samples on display with instructions and everyone chose what they wanted to make.

The first is a little gift bag that could contain anything from a couple of sweet treats, to make-up or jewellery.
The greeting is from "Polar Party" that cute little Christmas set and the ribbon tail flag was die cut with the Big Shot using the Petal Cone Die.  We stamped the greeting in Chocolate Chip ink then using the Cherry Cobbler Marker Pen spritzer over the top.


Of course some co-ordinating Spotted Scallop Ribbon is making an appearance and attaching it a Glimmer Brad, you can't appreciate just how gorgeous these are until you see one in the flesh!!

Back with some more projects soon.

Thursday, December 15, 2011

Embossing with Stripes

Don't you just love the Textured Embossing Folders that Stampin' Up! have, they give such a deep embossed texture and transform a simple piece of cardstock into something great!  This card features the new "Stripes" folder, perfect for those manly cards but still add a touch of class to any occasion.

My colour combo here is Pool Party, Island Indigo and Certainly Celery.

This cute little hippo is from the stamp set Kidoodles, the images are cute and great for colouring/watercolouring.  This card wasn't my idea, I saw it whilst blog hopping and loved how simple it was, just perfect to case for one of my 6 cards.

I used Blender Pens with the ink in the lids of the Ink Pads to colour in the hippo image.  Although these images all have a greeting attached to each stamp you can of course use a marker pen to use either the image or the greeting separately.

The lovely scallop trim circle was die cut using the Big Shot with the "Perfect Penants" die, this die also for creating Bunting!!

That lovely decorative border at the top is from the stamp set "Creative Elements" which I received at Convention, it is such a beautiful set consisting of 8 stamps.

Saturday, December 10, 2011

6 Cards Class projects

Our first card at November's 6 Cards Class was this, the idea came from Jane, we made a similar version at our Pyjama Shoe Box Swap in our rooms at Disneyland Paris.  I didn't steal the whole idea, just took the colours and sketch then added my own stamps.  Thank you Jane for the inspiration.

So I chose the stamp set "Nature Walk", a really versatile set that even works for man cards too as you can create some lovely collages with it.  We used Marker Pens to colour in the image to give a multi-coloured effect.

I have a new Marker Pen starting soon, still have a couple of spaces left so if you are interested in spreading the cost of the whole set then just get in touch.

The greeting is from "Perfect Punches" and as it's title tells, each of the greetings co-ordinate with Punches.

Thursday, December 8, 2011

Season of Joy!

"Season of Joy" is one of my all time favourite Christmas stamp sets, I love it even more as it can be used for non-Christmas cards as the Poinsettias can easily pass for flowers if using subtle colours and that swirl just has so many uses.

My colour combo here is Real Red, Old Olive and Whisper White.  That spotty scallop ribbon is making an appearance again, can you tell that I love it, the Cherry Cobbler version is even more delicious!!  Such a sweet and simple design here.
The Poinsettia's have been hand cut and layered using Dimensionals to make them stand out and on one I have added some of those cute little mini silver brads, they are just £2.95 for 200 of the little beauties and I have been using them on everything!!

Back soon with some piccies of my birthday trip to New York and Canada!

Tuesday, December 6, 2011

Watercolouring....

I just love to watercolour and we have some lovely outlined image stamps in the new Catalogue which are perfect for this.  "Easy Events" is one of those sets, lots of lovely images just waiting to be coloured in.

On this occasion I stamped the tree image with black StazOn ink onto Watercolour paper, this is to stop the bleeding when colouring in.  I used marker pens to scribble splashes of colour to the stamped image then the Aqua painters to move the colour around my image as required.  The finished effect is just as if you have painted with a brush, really soft and washy!
Ooops, there's that scallop ribbon again, this time in Chocolate Chip!!  Can you see the new "Stripes" Embossing Folder, loving that, such a useful one for all occasions.  The Designer Frame is also an embossing folder, it comes as a pair, the other is an oval with lots of dots around the edge and you are sure to see that here soon , at £7.95 for both a great bargain too!

I have a pretty busy week preparing for classes but will be back shortly to show you more!

Sunday, December 4, 2011

Sweet Snowglobe

Here is another card from my November class, this time using one of the "A La Carte" (single) Stamps "Sweet Snowglobe".  This stamp co-ordinates with the 1 3/4" Circle Punch and Sweet Treat Cups but here we simply just punched it out and gave it a bit of 3D!

We used "Serene Snowflakes" stamps to create the background on the Riding Hood Red layer, the snowflakes are just so delicate and the Kraft White Ink works perfectly on the Riding Hood Red, we also daubed around the edge.

For the Snowglobe we stamped it twice, once in Early Espresso ink then we inked it up again but this time using 4 marker pens, baja breeze (snowflakes), Riding Hood Red (house) and Old Olive and Early Espresso (trees) then punched it out using the 1 3/4" Circle Punch.  Using tombow we added adhesive to the snowflakes then poured on Dazzling Diamonds and set it to dry before layering over the Espresso image using Dimensionals.  We added some mini silver brads to the base of the Snowglobe which are hard to see from the picture.

We used the Big Shot to emboss those lovely dots onto Crumb Cake cardstock and stamped our greeting which we punched out with the Decorative Label Punch.  Don't you just love that spotty scallop ribbon, I know I do!!

Would you like to re-create this card, this stamp is only £8.95 and can still be delivered in time for you to make your Christmas cards, call or text for further information!

Saturday, December 3, 2011

Convention 2011

At Convention we have a formal Dinner and Awards evening to recognise those who have achieved throughout the year.  There were some beautiful frocks to be seen and some heels to die for!  I had planned on buying "sensible shoes" as I knew I was going to be walking the stage a few times but couldn't resist those patent Ted Baker skyscrapers and my roomies were sure that they were going to bag themselves a cheque from "Youv'e Been Framed", but fortunately for me they were unlucky this time!!!  I won some lovely gifts over the weekend for my achievements and also won the Prize Patrol too along with some sneak peak stamps that I can't share with you yet!


Here I am with the lovely Shannon West, she is such a beautiful person, so warm and natural and if you have met her I am sure you would agree.  She is wearing an apron she made with the new Timeless Portrait Fabric, we had a couple of Main Stage demonstrations from Shannon and she is a true inspiration. I am really keen to learn how to use that Sewing Machine that is sat in the corner of my Craft Room but will definitely need a bit of help to get me kick started!

There are large screens at either side of the stage so that we can see the Demonstrations in close detail, we had lots of wow's over the weekend and lots of inspiration too.  There are several large display boards full of samples and I took many many photographs to bring home with me.


Here I am with Caroline, we are sat in the Bar Area at our Hotel, looking like weve' had a couple of Martini's too many!!!

I can't wait for Convention 2012, Germany here we come!!

Monday, November 28, 2011

More from Convention

So here are my roomies, we had such fun and laughed lots, we stamped, wined, dined, shopped and had our own Pyjama Party make and takes in our room!


Here are the gifts I made for my roomies:

Inside were decorated pages with spaces for photographs and journalling to keep as a momento of our time away.

Here we are on the Main Stage


and out and about the grounds

This is where we ate on Saturday night once Convention was all finished, we had such a giggle here, something I will remember for a long time, good food and great company, what a great combination.


Do you fancy joining me at Convention 2012 in Germany, it really is so great to get together with lots of other Demonstrators, swap, share, learn and be inspired.  Being a Stampin' Up! Demonstrator is just the best, why not join my team and have the opportunity of earning some pennies in your pocket for doing something you enjoy, hours to suit you and your family!  Email or call for an informal chat about the opportunities available to you.

Sunday, November 27, 2011

I'm Back!!!!

Wow, 6 flights in 9 days, I am totally pooped, but what a ball I have had, Paris, New York, Canada and I can't wait to share it all with you.

But first things first, just a reminder that booking closes for my December Classes tomorrow, here's a couple of pictures to jog your memories:


So, these are just for the Wreath Classes on Saturday 10th December at Alveston Methodist Church and Monday 12th December at Whitminster Village Hall.

Remember there are also the other options of the Christmas Stamp a Stack (15 simple but stunning cards) and the Tags, Favours and Boxes Classes at both venues on the same dates.

Booking must close tomorrow to ensure delivery of your goodies included with the class.


Sunday, November 20, 2011

Still here, honestly!!

Hi all, apologies for my absence, I have just returned from the Stampin' Up! 2011 Convention at Disneyland Paris, the run up to going away was a little hectic with swaps, roomie gifts and class preparations and I have to say I was relieved once we were on our way knowing that everything was complete and in place for the weekend.

I shared a room at the Disney Hotel "Sequoia Lodge" with Jane, Caroline and Gill, we had such fun.  Convention is such an exciting place to be, with over 300 demonstrators from the UK, France and Germany all joining together, sharing, learning and being inspired by each other.

Here we are, and ignore the fact that I have my eye's closed, I try my hardest to keep them open and now everyone is used to taking at least 3 shots when I am in the picture just in case, on this occasion it just wasn't happening!!!

From left to right, Jane, Gilly, Me (with my eye's closed), Caroline and Hayley.

Here we have just signed in for Convention, collected our Bags complete with 2 Stamp sets, Lanyards, Award Pins and more, waiting impatiently to go into the Momento Mall to shop for all our Stampin' Up! Branded Logo goodies!


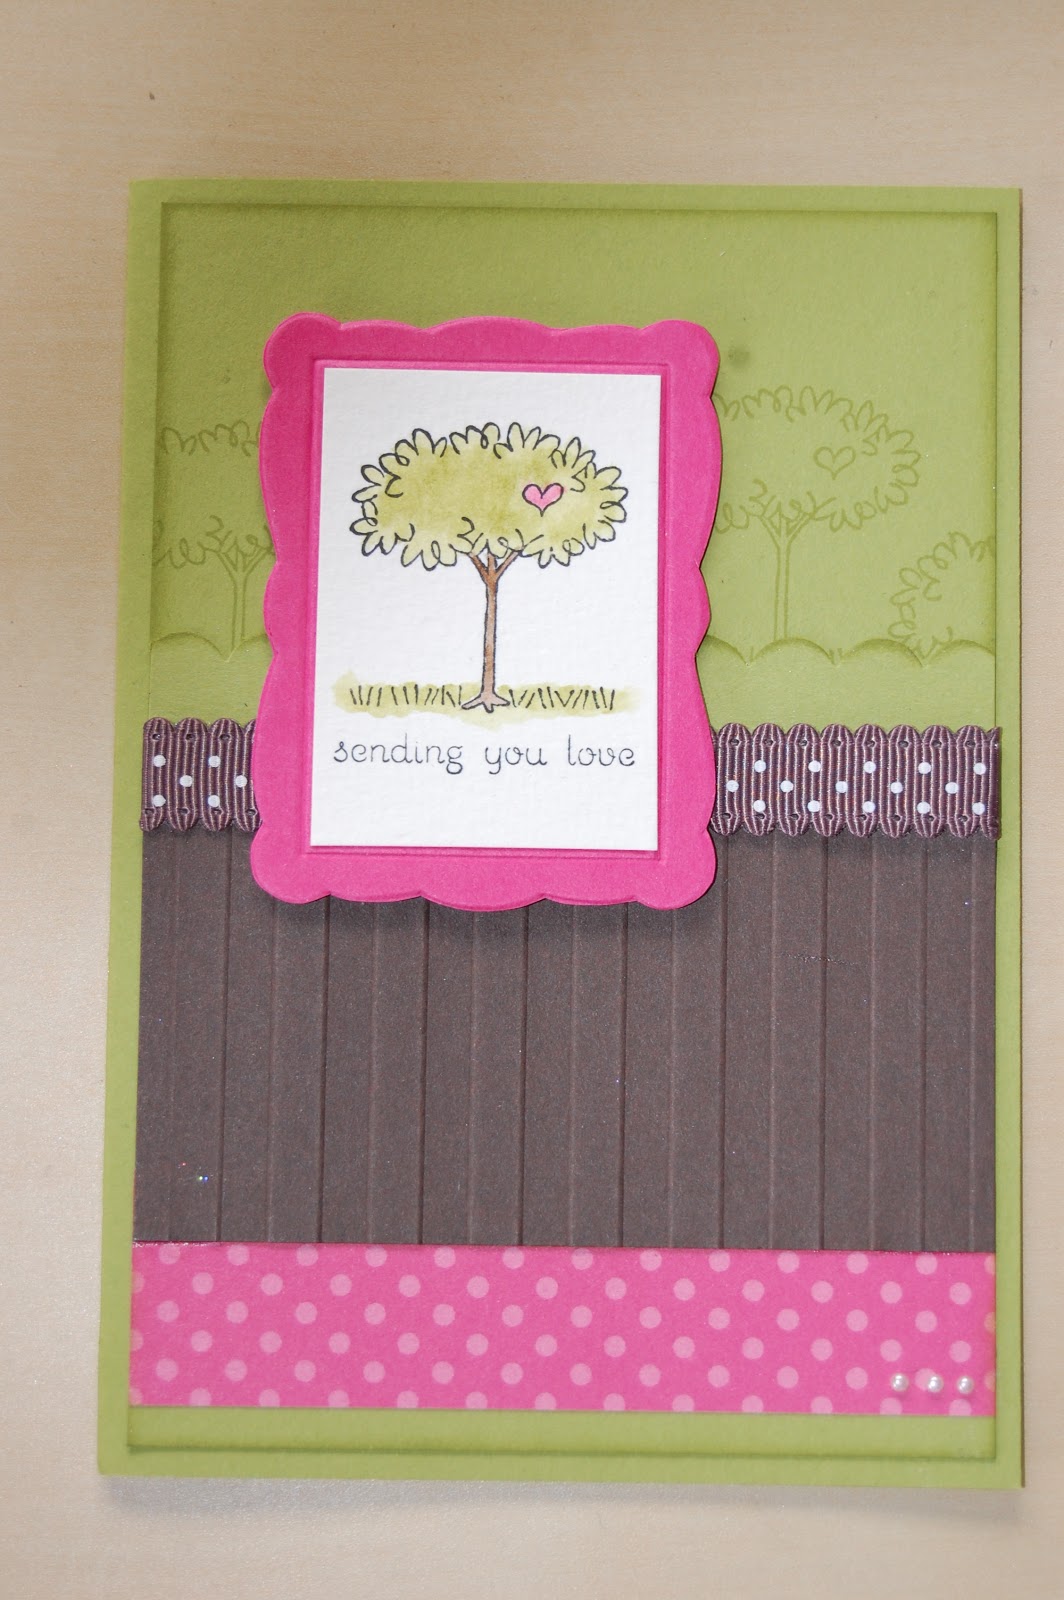
After the excitement of the Momento Mall we began our swapping, here is one of the designs I put together, something we made a my classes earlier this month, it uses the beautiful stamp set "Everything Eleanor" which I just adore, for the background I used the bleaching technique.


Do you recognise this lovely lady, our guest Presenter, of course, it's Liz Shannon up on stage wowing us with her creations!

During the day we do lots of creating, learning and sharing, we also get to have our very own "Make and Take" sessions too:


That's all for today, I am off to New York tomorrow to celebrate my 40th Birthday so I have lots of unpacking and re-packing to do!  I will try to share some more convention photo's with you before I go!


Friday, November 4, 2011

In August we drove over to France in the Motorhome to spend a few days away sightseeing and relaxing, and after not having spent any time in the motorhome away racing this year, due to Jack breaking his leg, it was nice to be in there again, it's our little home from home!

During our stay in France we drove a lot, stopping off at places we liked and we packed so much into our little adventure.  Of course my camera was with me all the time so I took lots of photographs to share when we got home.

Once place we wanted to go to was the Abbey of the Mont St. Michel, the most amazing


We used a base colour of Crumb Cake and teamed it with Always Artichoke and Not Quite Navy which co-ordinated with our Springtime Vintage Paper (now retired). The new Lace Ribbon Punch made a beautiful border down the left side of the layout and we punched out Whisper White circles and stuck them behind to make the border stand out a little.

We used the Big Shot to create our title with the "Timeless Type" Sizzlits Dies, it is just so quick and easy to cut them out. The "of" was stamped using "Just Perfect" alphabet stamps which are also really great for personalising your cards too!

The Not Quite Navy flowers were something Amanda Fowler showed us on a swap she created and I just love them. They are created using the 5 Petal Flower punch and then one of the Bitty Punches for the centres attached with a brad. The large River Rock flower to the bottom right was die cut using the "Fun Flowers" Bigz L die with the Big Shot Machine.

Those pretty little butterflies in the top left corner were stamped using "Clearly for You" stamps in Crumb Cake ink so we had a tone on tone effect.

Thursday, November 3, 2011

Scrapbooking with Bunting!

Here is one of the layouts we created at October's Scrapbook Class.  Mine is lacking a title but I will get around to it at some point soon!

Lots of stamping and punching out on this one with some hand cuttnig too, I kept them very busy!  We used the new stamp set Penant Parade and also the lovely flower set called Printed Petals with a colour combo of Baja Breeze, Not Quite Navy and Cherry Cobbler.  The papers are now retired but we used a selection from Springtime Vintage, I am a little late in showing these!!


We used the fab Penant Builder Punch to punch out our bunting, it just makes such light work of it then added some small circle elements which are also in the Penant Parade stamp set.

If you would like to create some Scrapbook Pages to preserve your memories, why not book into one of my classes, the next one is Tuesday 15th November at Whitminster Village Hall, 7.00pm and we create 3 layouts at this class.

Tuesday, November 1, 2011

New Promotion - "It's Good to be the Hostess"

It’s Good to Be the Hostess Promotion


Get even more FREE products when you host a qualifying Stampin’ Up! workshop 1 November – 15 December 2011.

Get the Paisley Petals Set and coordinating Paisley Petals Designer Series Paper for FREE—up to a £33.90 value—when you host a £300 workshop! This brand-new stamp set and Designer Series Paper are in addition to all the other exciting and generous benefits you get as a Stampin’ Up! hostess. 

Thursday, October 27, 2011

Birthday Wishes

Goodness, where has the time gone, I have a confession to make, it has been one whole week since my last blog post!!!!!!  I have been soooo busy this month, I am afraid that my blogging has become a little lapse but I have lots to show you so will try and spare some time to share them with you.

So today it is Jane's (Jane Cutting, my Stampin' Up! mummy) birthday and as I have been so busy this week, I was sat at 8.00am in my craft room creating her card.  I took some inspiration from the Catalogue for this one and gave it my own "stamp"!

I think this stamp set is just so beautiful, it is called "Everything Eleanor" and is just so feminine with a touch of vintage style.  The large swirl is gorgeous and great for creating backgrounds.  You can find it on Page 57 of the Catalogue, priced at £26.95 Clear Mount or £33.95 Wood Mount and it consists of 8 gorgeous stamps.

My colour combination is Wisteria Wonder, Pool Party and Concorde Crush, all "In Colours" and they work beautifully together.

I also used "French Foliage" on the Very Vanilla layer which I have distressed and daubed with crumb cake ink then the "Birthday Wishes" greeting is from one of the Hostess Stamp Sets called "Happiest Birthday Wishes", a lovely set. 

Can you see the new Punch?  It's hiding just under the Vanilla layer, the new Dotted Scallop Ribbon Border and it is so sweet.

If you would like to earn yourself some exclusive Stampin' Up! products, why not host a party yourself in the comfort of your home, all you need to supply are your guests and I will do the rest!

STAMPER'S 6 VIRTUAL HOSTESS CLUB

JUST ONE MORE SPACE LEFT, CONTACT ME TODAY OR CLICK HERE TO VIEW THE DETAILS.

Thursday, October 20, 2011

Big Shot Class

At this month's Big Shot Class we concentrated on ways of using the "Milk Carton" die.

Here are our three projects, a Milk Carton Carrier, Butterfly House and Cracker:

and a close up of the Butterfly House which I am sure you will have seen before.  I was inspired by Hayley Gillie who had a Christmas Version of this little house on display at our recent show in Bristol and then saw that Jenny Moors had a feminine version with a bird and I just fell in love with the size of it, much bigger than the general Bird Houses we have all made before.

Isn't it cute, would hold a lovely little gift inside don't you think!

If you would like to learn new ways of using your dies with your Big Shot, why not come to my next Big Shot Class at Whitminster Village Hall on Tuesday 15th November, 7.00pm.

Monday, October 17, 2011

New Virtual Club "Stampers 6"

PLEASE SCROLL DOWN FOR MORE RECENT POSTS

Morning Everyone, I have a new "virtual" club starting:

Stamper's 6 Club

Would you like to receive lots of Stampin' Up! products and have the opportunity of being a hostess but don't have enough creative friends, time or space in your home to get a party together, then this Club is for you.   By joinging my "Stampers 6" club you will receive all the benefits of being a hostess without having to hold a party in your home.

The new Hostess Benefits in the 2011/12 are fabulous, Stampin' Up! are giving you so much more choice and value for money and you really don't want to miss out on this opportunity, it is great.  Your Hostess Pounds can be spent on exclusive Hostess products or on anything you like from the Catalogue.

Here's how it works:

For this "virtual" club I need 6 people to join (I will find these people but if you have a friend who may be interested then pass on this information).  The club runs for 6 months, each month every member agrees to place a £25 minimum order on an agreed date(excluding p&p) which will give a qualifying workshop order that is required to obtain Hostess Pounds to spend in the Catalogue.

Each month a different member of the club will get the opportunity to be the Hostess and choose her free Stampin' Up! goodies.

Payment for your order can be made by Cash, Cheque, Visa/Mastercard or Bank Transfer.

Each member will also receive a FREE copy of the current Stampin' Up! Catalogue valued at £5.95.

If you are local to me you can collect your order but there will be a £2.95 charge for posting any orders if you are not local.

I would like to start this Club on 1st November so don't delay, contact me now on 07717 068909 for further information.  Once I have 6 people we can get started and I am more than happy to run further clubs if the need is there.

Sunday, October 16, 2011

Waterfall Card

Last week we made a Waterfall card at our monthly card class and I decided to do another using some of the new stamps from the Catalogue.  I chose Delicate Doilies and Easy Events.

My colour combination is Pear Pizzazz, Wisteria Wonder (one of the new In Colours) and Concorde Crush teamed with some Whisper White.

We stamped the Delicate Doiles in Concorde Crush ink onto the Wisteria Wonder layer and daubed around the edges, this was mounted onto our Pear Pizzazz layer.

I used one of the new stamp sets called "Easy Events" to create my waterfall images, inking them with Marker Pens to omit the wording at the bottom of each image.


If you would like to see how this card works, why not book a party with me and I will show you how, and at the same time you can be having a fun night in with your friends and earning yourself some free Stampin' Up! goodies!

Sunday, October 9, 2011

Delicate Doilies, so pretty

I just love this stamp set, it is just so "delicate" and pretty, the images are so intricate and beautiful.

The picture isn't the best quality but I have used a couple of the new In Colours, "Pool Party" and "Indigo Island" and teamed it with some Pretty in Pink and Whisper White.

The "Delicate Doilies" stamp set is perfect for creating backgrounds and it is from the "Flirtatious" product suite which has some lovely co-ordinating products.  I used the new Lace Ribbon Punch to create the border and the three flowers were also cut from the same punch, really pretty.  It also leaves behind lots of tiny flowers which can be used on your cards and projects.

Other items in this range include the Flirtatious Designer Series Paper, and the gorgeous new Designer Fabric.

The cupcake image and greeting are from another new set called "Easy Events" and as they are one stamp I used a Marker Pen to ink up the Cupcake image first then cleaned the stamp and inked up the greeting separately.  I punched the greeting out using the Word Window Punch then created the label behind using the Decorative Label punch, punching once then re-inserting it into the punch to create the smaller shape.


Wednesday, October 5, 2011

New Marker Pen Club

This time last year I ran a couple of Marker Pen Shares and I have decided to run with it again as it is such a great idea, not mine I might add!  Here's the details:

Would you like to own the complete set of Stampin' Write Marker Pens in their sturdy Carry Case? They are really great marker pens which are double ended with a thick brush tip and fine end for journalling. You can use the pens to colour onto your rubber stamps to create multiple coloured images, for water colouring, colouring in neutral ribbons, colouring on vellum to create stained glass images, the list goes on and the beauty is that they co-ordinate with all of the Stampin' Up! colours so you will have every colour to hand.


I need 5 people to join the share, each will agree to pay £29.95 per month for a total of 5 months. 

Each month you will receive:
  • A colour family of Marker Pens
  • A pack of A4 Assorted Cardstock
For one of the 5 months you will become the "Hostess" and receive "£25 Hostess Pounds" to spend on anything you wish from the catalogue, this includes the exclusive Hostess selection. 

By the end of the 5 months you will have:

  • 48 Marker Pens (this includes the 10 In Colours)
  • The Carry Case
  • 6 Packs of A4 co-ordinating cardstock for each colour family
If you join this club you are commited to the whole 5 months and I will require payment on a set date every month, either by Cash, Card (Visa/Mastercard), Bank Transfer or Cheque.

I already have a couple of ladies interested in this Club so please let me know asap if you would like to take part and we can get the ball rolling!

There will be a postage charge at cost to send out your monthly Markers, Cardstock and Carry Case but if you are local you can collect from me or at a class.

Email me at stampinkerry@aol.com or call on 07717 068909 for further information.

Thank You Cards

Here are some of the Thank You Cards I have been creating for this month's orders.  They use one of the new stamp sets called "Pennant Parade" which consists of 13 stamps that create beautiful bunting.  Now something that makes this stamp set even more loveable is that there is a co-ordinating Punch called the "Petite Pennants Builder Punch"

I have used a colour combination of Baja Breeze, Pretty In Pink and Pear Pizzazz teamed with a Crumb Cake base and Very Vanilla embossed layer.

The "Thank You" greeting is also from the "Pennants Parade" set which I have punched out using the 3/4" Circle Punch.

I have also brayered the inside of the "Vintage Wallpaper" Embossing Folder with Crumb Cake ink so that you get a two toned finish, although it is difficult to see in the picture.

Saturday, October 1, 2011

It's here, the new Catalogue....

I am so excited to be able to share the new 2011/12 Stampin' Up! Catalogue with you today.  It is full of so many delicious new stamp sets, patterned papers, punches, Big Shot Dies and some very new things too, including Fabric, yes Fabric.


You can get your own copy for £4.95 delivered to your door, just email me at stampinkerry@aol.com for details.

There are some fantastic changes to the Hostess Benefits this year, Stampin' Up! are giving you more goodies along with more choice!  You don't have to spend all of your Hostess Pounds on the Exclusive Hostess Goodies, you can spend it all in the catalogue if you wish.  You also have the opportunity of purchasing items at 50% off if you party reaches £300, and this could be any item in the Catalogue, even the Big Shot Machine or one of the Alphabet Die Sets.  See the table below for the details.


Well I don't know about you, but I am off to shop now, my Wish List is huge and will have to narrow it down somehow.

Check back soon for details on my new Virtual Clubs and Shares.

Friday, September 30, 2011

Birthday Bunting!

Earlier this month it was Gaynor's birthday and she was the first person I sneaked new products to with her Birthday card!  This is the gorgeous new stamp set called "Pennant Parade", bunting lover's paradise!! Gorgeous stamps designed to co-ordiate with each other to make the most delicious bunting on your cards or scrapbook layouts, and to add to it, the "Petite Pennants" Builder Punch that punches each piece out with ease, it just couldn't be simpler!

Personalise your cards and projects with names, places and numbers, I mean, who doesn't want a birthday card reminding them that they are 21 again!!

So to top the beauty of this little number I used some of the new In Colour's:
Pool Party
Wysteria Wonder
Lucky Limeade

They are gorgeous too, and work lovely together.

I used the "Just Perfect" Alphabet Stamp Set to create the "happy" word, punching them out with circle punches and "Curly Cute" stamps for the "birthday" bit making a flagged banner. 

Of course I added lots of bling using the Rhinestons and some of the new Designer Paper called "Flirtatious" which is from the Speciality range.

Want to see these products in action, why not host a party and earn yourself some delicious Stampin' Up! products for free.  I have a couple of spaces for November, just give me a call!

New Catalogue launch is tomorrow, watch this space ........

Friday, September 23, 2011

Big Shot Class with the Pillow Box

This month's class showed different ways of using the Pillow Box Bigz Die.

Now you may have seen the Owl before, it has been re-created dozens of times by others and I have had a pictured stored in my favourites for ages, waiting for the chance to make it myself, it is just sooooo cute, don't you think?


This is an extended version of the Pillow Box, and I just love this colour combo of Soft Suede, Regal Rose, Peach Parfait and So Saffron.  The 3D flower was put together using the 5 Petal Flower Punch and the teeny tiny flower in the middle is one of the "Itty Bitty" Punches, finished with a co-ordinating brad!

The "Happy Birthday" greeting is from the Hostess set called "Something To Celebrate" which is soon to retire.


Next we made a little gift bag using two of the die cut pillow boxes, I haven't seen one of these before but I am sure that someone has created one somewhere out there in the crafting world!  We used the "Perfect Polka Dots" Embossing Folder on the So Saffron Panels and again used the 5 Petal Flowers for decoration.  We added a strip of Soft Suede Card to create our handle and of course created a base inside so that our goodies won't fall out!!


And of course, not forgetting Mr Owl, he is just soooo cute, you can't help but love him!  Lots of punches used here but a really inexpesive gift if filled with some sweet treats or costume jewellery!

Hope you have enjoyed our projects for this month, do leave a comment so that I know you stopped by!