Showing posts with label Season of Joy. Show all posts

Thursday, December 8, 2011

Season of Joy!

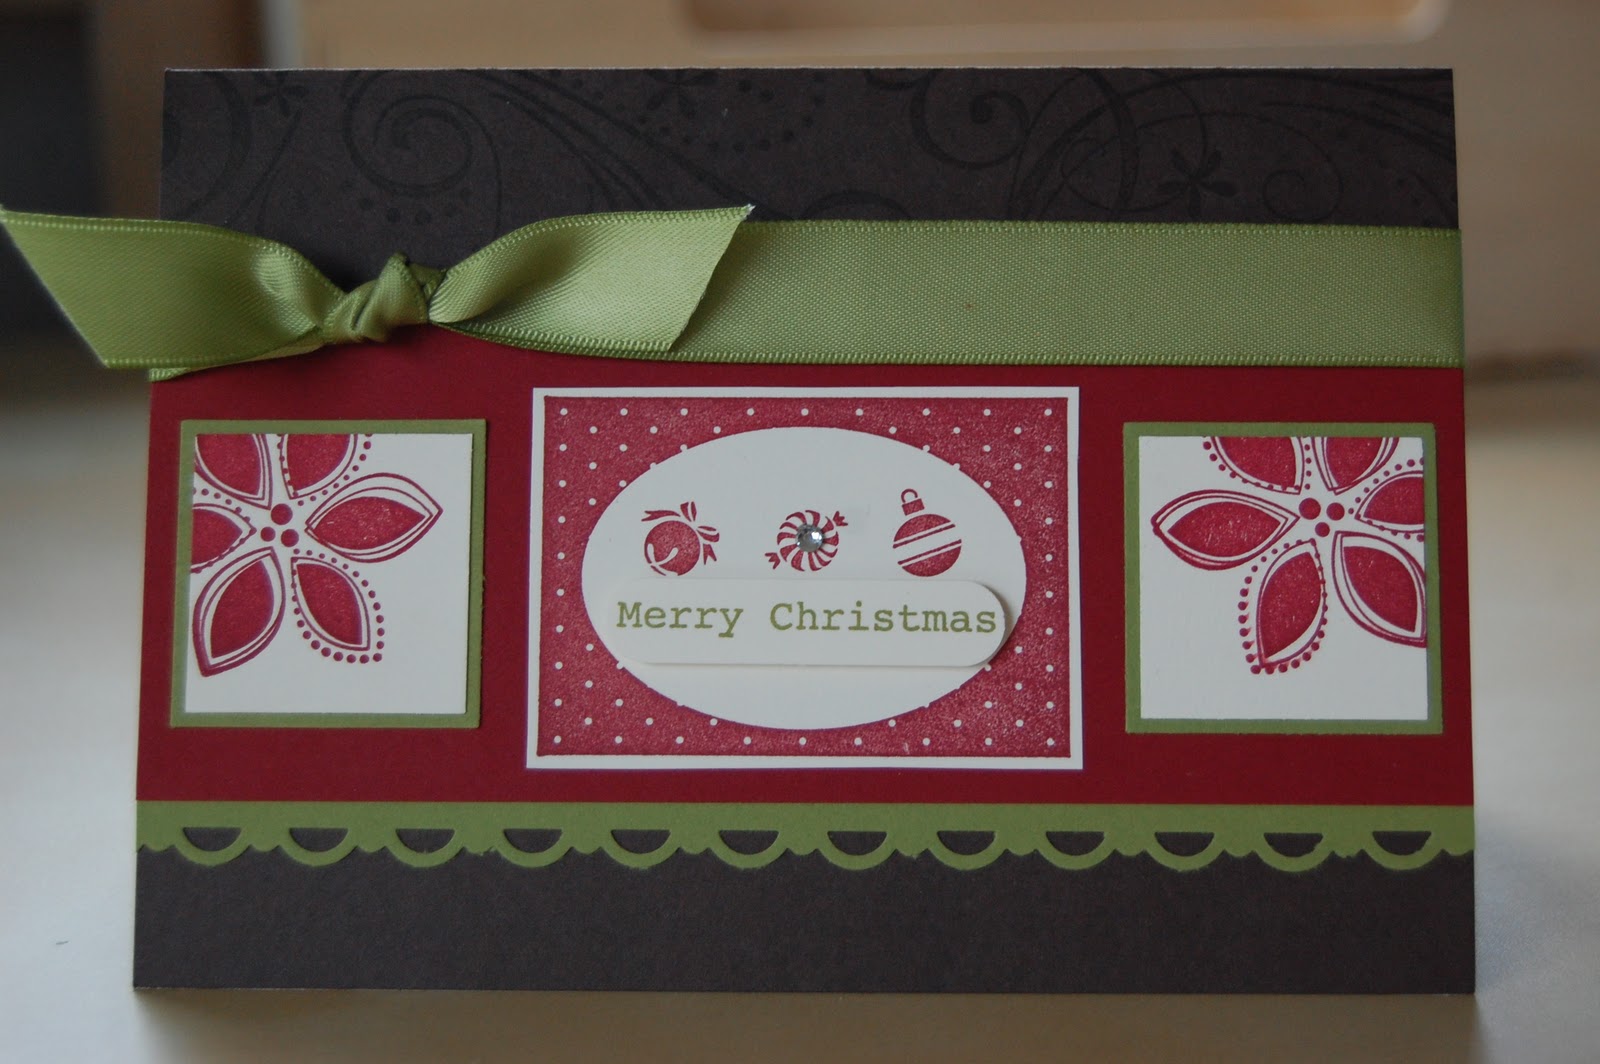
"Season of Joy" is one of my all time favourite Christmas stamp sets, I love it even more as it can be used for non-Christmas cards as the Poinsettias can easily pass for flowers if using subtle colours and that swirl just has so many uses.

My colour combo here is Real Red, Old Olive and Whisper White.  That spotty scallop ribbon is making an appearance again, can you tell that I love it, the Cherry Cobbler version is even more delicious!!  Such a sweet and simple design here.
The Poinsettia's have been hand cut and layered using Dimensionals to make them stand out and on one I have added some of those cute little mini silver brads, they are just £2.95 for 200 of the little beauties and I have been using them on everything!!

Back soon with some piccies of my birthday trip to New York and Canada!

Tuesday, December 21, 2010

6 Cards Class

For the third card we made another Christmas design, this is a great sketch which would work with most smaller stamp images that fit inside the squares.
We used the Poinsettia stamp from the "Season of Joy" stamp set with Cherry Cobbler ink onto squares punched with the 1 1/4" Square Punch which we then layered onto Soft Suede 1 3/8" punched squares.  We used the swirly stamp with Crumb Cake ink stamping onto the Crumb Cake card base tp finish.

Tuesday, December 14, 2010

Gifted

We made this card at Lucy's workshop recently using the stamp sets "Gifted" and "Season of Joy".  Our colour combo was Early Espresso, Cherry Cobbler and Old Olive, very Christmassy and I love these colours together.  We stamped our centre image using one of the stamps from "Gifted" in Cherry Cobbler Ink then again in Old Olive.  From the Old Olive image we punched out the "Merry Christmas" greeting and layered on the Cherry Cobbler image using Dimensionals.  We added a Basic Rhinestone to the centre of the card to add some sparkle!  We used the 1 1/4" and 1 3/8" square punches to punch and layer the Poinsettia image from "Season of Joy".  

It is tempting to think that the "Gifted" set is only for making Gift Tags as each image typically looks like a tag, but there would be endless creations and projects that could be created with this set of 5 stamps.

Monday, December 13, 2010

Getting there...

Well I finally finished my first batch of Christmas Cards, phew but still have more to make!!  It is surprising how much time is spent putting everything together but I am pleased with the results, quite contemporary but I like them, hope you do too!!

For this design I used "Playful Pieces", a Level 3 Hostess Set which is just so cute, so many different elements to this set, the possibilities are endless!
For the other design I used the Poinsettia stamp from the "Season of Joy" set.  For both cards I used a Soft Suede card base and stamped snowflakes from the "Serene Snowflakes" set in Soft Suede and Kraft Whisper White inks.  I used Cherry Cobbler on the Poinsettia Card and Riding Hood Red on the Present one.


Wednesday, December 8, 2010

Christmas Cards.....

I am running a little behind with my Christmas cards, well they are half ready, just waiting to be assembled.  I made myself a vow to make Christmas cards regularly throughout the year this year, but it just never happened, I managed to make 4 in January and that was as far as I got!  Maybe I will run a monthly Christmas Card Class where we make a stack of cards each time then come Christmas there is no rush as they are already done!!  Watch this space for more details!

So here are my cards in preparation for assembly, I will need to make more batches but little by little and I will probably change the design and colour combo for the next ones!

I have used Soft Suede, Cherry Cobbler and Baja Breeze teamed with Very Vanilla, how yummy!!  I included some of the gorgeous "Jolly Holiday" Designer Series Paper which is a favourite of mine at the moment.  I used the stamp sets "Season of Joy" for the Poinsettia, "Serene Snowflakes" for the card base background and "Tiny Tags" for that cute little "merry" greeting.

Stop by again to see the finished result!!

Friday, December 3, 2010

Making Gifts & Cards Class

I have a couple of things to show you from some recent classes and this was something we made at Alveston at the end of November.  At this class we make a card and a 3D project.

This month I decided to do a 3D card and chose the Triangle Fold design for this cute little Christmas card.  The stamps are from "Season of Joy" and we inked it up in Cherry Cobbler.  Our colour combo was Soft Suede, Cherry Cobbler and Baja Breeze and we used some of the "Jolly Holiday" Designer Series Paper.  The ribbon is the gorgeous 1 1/4" Striped Grosgrain, tied with linen thread through a Designer Button from the Neutrals range.

Once you remove the belly band, this is what the card looks like inside:

Ah, so sweet, I just love this colour combo too!

Tuesday, August 17, 2010

Tree Trimmings Class

Last night I held my "Tree Trimmings" Class where we made an incredible 6 cards in an evening, quite a push I know but we got there in the end, thank you ladies for coming along, I hope you enjoyed the class and weren't too tired by the time you got home!

We made an assortment of card styles, all using "Tree Trimmings" and used the "Season of Joy" stamp set for the greeting and swirl.  The DSP was from "Merry Moments" which has traditional Christmas colours including Old Olive, Real Red and Chocolate Chip which we teamed with Very Vanilla.
and the final three:

I am going to re-run this class in September so will let you know when I have put some dates together, email me if you might be interested in coming along!

Thursday, July 29, 2010

Christmas in July Class

Yesterday I held one of my day classes "Christmas in July" and I will be re-running this as an evening class, dates to follow shortly.

We made 6 delightful Christmas Cards, all using the gorgeous "Serene Snowflakes" stamp set, I really love this set it is so pretty and can be used in so many different ways.
We made six cards in total, 3 designs, 2 of each colourway, Old Olive/Chocolate Chip and Old Olive/Rich Razzleberry.  We also used the "Merry Christmas" greeting from "Season of Joy" stamp set and the Jumbo Wheel "So Swirly" along with the cute "Tiny Tags" and these all worked together lovely.  Here's a close up of the cards:


 We used Versamark and Silver Embossing Powder on some of the Snowflake images and then the "Platinum Shimmer Paint" on others, both looked equally nice.  With the Shimmer Paint you just use a dauber to apply it to the rubber stamp and then stamp onto your cardstock as you would normally.  This really gives a lovely silver shimmery image, gorgeous!

We also used embellishments from the Pretties Kit and Old Olive 5/8" Satin Ribbon.  We had a lovely afternoon crafting and it is surprising where the time goes!

Tuesday, December 1, 2009

Sorry for the absence!

I have been unable to post for a little while due to changing my Internet Provider but now it is all up and running again so I can get back on track!!


I have been preparing some items for sale at Craft/Christmas Fairs that I have booked and here is a nifty little number that holds a Gift Card, I found this tutorial on my travels whilst blog hopping one evening so thought I would give it a go.  I have used "Season of Joy" teamed with Old Olive and Real Red cardstock and inks.  The background of the gift card holder was stamped in Kraft White ink with the Snowflake stamp.

Here is the inside, I have cut away a slit using the Word Window Punch which is where the gift card sits.  I have threaded a piece of silver Elastic Cord from the back to the front and tied in a bow as a closure.


Monday, October 26, 2009

Open Day Make & Take


Here is a sample of one of the make and take projects we created at my Open Day on Saturday, I was inspired by a similar design created by Jane.  We used the "Season of Joy" stamp set along with Old Olive, Chocolate Chip, Ruby Red and Very Vanilla card.  We randomly stamped the snowflake image onto the card base in Old Olive ink, then stamped the tree in the same colour, cut it out and raised it with dimensionals.  Using the Stamp-a-ma-jig we stamped our greeting in Real Red ink then stamped the small poinsettia twice in the same colour.  We used the 3/4" punch to cut the old olive circle and 1/2" punch to cut out the small poinsettia then layered them together.  We used the Cropadile to set the eyelet on the Ruby Red band at the bottom of the card and added a Chocolate Chip knot and two rows of paper pierced holes for extra texture.  This piece was raised using Dimensionals.  Inside we stamped around the edge of a piece of Very Vanilla cardstock to complete the card.