Wednesday, December 30, 2009

Inspiring Inkin' Sale-a-bration Blog Hop!


It's Sale-a-bration time everyone!

Welcome to the Inspiring Inkin' Sale-a-bration blog hop.  Us "Inkies" have been busy creating some exciting projects using exclusive stamp sets that YOU can earn during Sale-a-bration.  For every £45 you spend during January and February you will qualify to receive a FREE, yes FREE stamp set from the Sale-a-bration flyer.  Please contact me for details about placing an order or if you would like to host a Home Workshop or book into any of my classes. 

Each blog on this "hop" will have the birdcage logo at the end of each post and you will see a link to the next blog on the hop, eventually you will come full circle back to your starting point, I hope you have a wonderful time on your journey!  Please leave comments as you visit, we would love to know what you think of our projects.

For those who have joined us from Amanda's blog, WELCOME!

******

Here is my first card using the Sale-a-bration "Wymsical Words" stamp set:

"Follow Your Heart" Side Step Card


Side-Step cards are a quick way of making a card with that "WOW" factor, I just love the 3D effect.

I have used the "Follow Your Heart" stamp from the Sale-a-bration set "Wymsical Words" and I just love the swirly font in the text on this set.  I stamped my greeting onto Certainly Celery and punched out using the 1 1/4" Circle Punch then layered onto a 1 3/8" circle in Rose Red, then onto a Chocolate Chip Scallop Circle which was punched out.  The Old Olive flower at the back of my greeting was from the Die Cut Blooms which can be found on page 83 of the SU Catalogue.

The main image is from the "Simply Said" stamp set, stamped in chocolate chip ink and coloured using the Rose Red Stampin' Write Marker, for the stems I used the Certainly Celery Marker.  I lightly inked the edge using a dauber with Chocolate Chip ink and layered this onto a piece of Chocolate Chip Cardstock.

The lower step on my card is covered with a piece of Rose Red cardstock edged using the Eyelet Border Punch and a strip of Rose Red Designer Series Paper to break it up.  My Flower is created using the 5-Petal Flower Punch, layered with Old Olive then one in Certainly Celery and a flower from "Simply Said" stamped and hand cut.  The centre of the flower has a brad sitting on a 1/4" circle punched from Chocolate Chip.

The middle step has three hearts stamped in Rose Red ink and using the Stamp-a-ma-jig with the 2-step stampin' technique I have stamped the floral heart in chocolate chip over the Rose Red image.  I hand cut these out and used my snail to place them accordingly.

The top step contains my greeting from "Wymsical Words" and a border in Rose Red Cardstock using the Eyelet Border Punch.

******

Here is my second card:

You're Too Kind


Again, using the "Wymsical Words" stamps I created this tent fold card in my favourite colour combination of the moment!  My base is Chocolate Chip with a block of Certainly Celery placed nearer the top of the card.  On this I layered a strip of Rose Red and matted with a piece of Regal Rose to which I attached a piece of 5/8" Certainly Celery across the middle and adhere with Sticky Strip on the reverse.

My three images are from "Pocket Silhouettes" stamped in Rose Red onto Whisper White cardstock, then hand cut into squares and layered onto Punched Scallop Squares using Dimensionals.

I stamped my greeting "You're too Kind" in White Kraft ink and then added a circle border at the top left of the card with a stamp from "One of a Kind".

******

And now to continue your journey you will hop to Vannessa's blog here!


Friday, December 18, 2009

Christmas Gifts


Can you guess what is hiding underneath this gorgeous combination of Old Olive and Chocolate Chip?  Well, Chocolate of course!  I covered some tubes of sweets/chocolates for my daughter to give to her friends and I was really pleased with how they turned out.


I covered the tubes with Chocolate Chip Cardstock then added a piece of "Merry Moments" Designer Series Paper around the middle and topped with a border using the Scallop Border Punch.  The tree and poinsettia images are from "Season of Joy" stamp set.  To cover the plastic lid on the tube I punched a circle using the Scallop Circle Punch and then stamped the Poinsettia stamp twice, hand cut and layered them with a brad.  The tube hidden inside just slides out easily to reveal the contents!


Wednesday, December 16, 2009

Purple Pleasures


This was one of the make and takes we completed at November's Monthly Stamp Class in Whitminster.  We used Perfect Plum and Pale Plum inks and cardstock along with Whisper White.  The images and greeting are from "Pocket Silhouettes" stamp set and are so versatile, suitable for any occasion, male or female.  We used the Eyelet Border Punch to create the lovely shaped corners on the card and also on the Perfect Plum layer along the bottom edge.  The greeting was cut using the Oval Punch and layered with the Scallop Oval Punch.  The edges were inked for depth using a dauber direct from the ink pad.  We used a piece of the Silver Elastic Cord wrapped around to create some texture.

If you would like to purchase any products from the Stampin' Up! Catalogue, attend any of my classes or host a workshop, please email me on stampinkerry@aol.com or give me a call.

Thanks for dropping by

Tuesday, December 15, 2009

Christmas Wedding


I am often asked to make cards for special occasions and this one is for a Christmas Wedding.  The colours are in line with the wedding colours as requested and I used Baroque Motifs and Mr & Mrs stamps sets.  I used Very Vanilla for my card base, layered with Bravo Bergundy and Basic Black.  I used the Eyelet Border Punch to add a feminie feel and flat back pearls from the Pretties Kit.  I inked all the edges with a dauber using the Bravo Bergundy ink pad.

Sunday, December 13, 2009

Customer Thank You's


I decided to make some envelope cards for my recent customers to say thank you for their orders.  I used Rose Red, one of my favourites, along with Old Olive and Whisper White.  The stamped image is from "Pocket Silhouettes".  I used the Word Window Punch to cut out my greeting and the Scallop Edge Border Punch for interest.  I added a piece of Rose Red Designer Series Paper on the bottom of the envelope, I love these papers, they are so versatile.

Thursday, December 10, 2009

Sweet and Simple


I was inspired by Amanda on this one, I love this colour combination and have used it previously as you may have seen.  I created a background using various stamps from "Circle Circus" inked in Chocolate Chip and Rose Red onto Whisper White cardstock then layered a piece of Chocolate Chip behind it.  I used the Scallop Edge Border Punch to create a strip along the bottom of the card and placed a piece of Rose Red Designer Series Paper above it.  I pierced holes in each scallop for interest and texture.  My greeting is from "Pocket Silhouettes" and stamped using the Stamp-a-ma-jig for correct placement.  I used the Mat Pack and Paper Piercing Tool to punch two rows of holes above the main image.  Purely sweet and simple!

Happy Stamping!

Monday, December 7, 2009

Monthly Class


Here is one of the Make & Takes from my monthly class last week held in the lounge at Whitminster Village Hall.  We used "One of a Kind" stamps along with So Saffron, Very Vanilla and Chocolate Chip cardstock.  The flowers are cut out with the co-ordinating "Boho Blossoms" punch and were stamped in Always Artichoke and So Saffron inks.  We placed a silver brad in the centre of one of the flowers for dimension.  We tied a bow on the tag using a piece of the 1/2" Striped Grograin Ribbon and used some of the Designer Series Paper from the "Tea & Crumpets" range.  All edges were inked using a dauber with Chocolate Chip ink.  Our title was placed using the Stamp-a-ma-jig.

Friday, December 4, 2009


Here is the card I made for my nephew's birthday, I used the boat stamp from "Nursery Necessities" and the greeting was from "Wow Flowers".  I teamed the images with Chocolate Chip, Kraft and Not Quite Navy cardstock and added a strip of Chocolate Chip Designer Series Paper.  I have used the corner rounder punch to round the edges of the layers to blend with the scalloped border.  I hope he likes it!

Thursday, December 3, 2009


I have been asked to make a card for a friend who is being a Godparent to twin girls so have made a few cards for her to choose from, this being one of them.

I used "Nursery Necessities" stamps on this one along with So Saffron, Perfect Plum and Pale Plum inks and cardstock.  The main background is from the Designer Series Papers in Perfect Plum and I distressed the edges for texture.  I used the small star stamp to create a subtle background on my So Saffron layer and punched a border using the Scallop Edge Punch and pierced each scallop using the paper piercing tool.  I printed my greeting onto Very Vanilla cardstock and punched a hole with the Word Window Punch into the So Saffron card to reveal the greeting beneath.  I used Dimensionals to raise my stamped images.

If you would like to order any of the products used in my card please email me at stampinkerry@aol.com or if you would like any information on Stampin' Up! products or becoming a Stampin' Up! Demonstrator you can call me on 07717 068 909 or 01452 740532.

Thanks for looking!

Wednesday, December 2, 2009

Anniversary Wishes


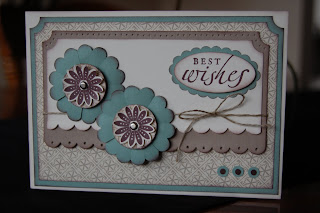
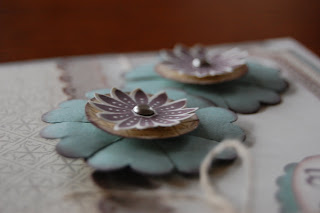
It is my parents Wedding Anniversary today so I made them a card using the Bella Bleu Designer Series Paper along with Kraft, Very Vanilla and Sage Shaddow cardstock.  I used the Scallop Circle Punch to create the blooms and stamped flowers from "One of a Kind" and cut them out using the Boho Blossoms punch.  I attached them onto a 1" circle cut from Designer Series Paper and added a silver brad for texture.  I inked all the edges in Chocolate Chip using a dauber.

My greeting is from "Sincere Salutations", cut with the Oval Punch and layered with a piece of cardstock cut with the Scallop Oval Punch.  I used the 1/2" Circle Punch for the corner cut-outs.  I wrapped a piece of Linen Thread around the top two layers of cardstock and tied with a bow.  I used Dimensionals to add height to my blooms.

Tuesday, December 1, 2009

Sorry for the absence!

I have been unable to post for a little while due to changing my Internet Provider but now it is all up and running again so I can get back on track!!


I have been preparing some items for sale at Craft/Christmas Fairs that I have booked and here is a nifty little number that holds a Gift Card, I found this tutorial on my travels whilst blog hopping one evening so thought I would give it a go.  I have used "Season of Joy" teamed with Old Olive and Real Red cardstock and inks.  The background of the gift card holder was stamped in Kraft White ink with the Snowflake stamp.

Here is the inside, I have cut away a slit using the Word Window Punch which is where the gift card sits.  I have threaded a piece of silver Elastic Cord from the back to the front and tied in a bow as a closure.