Wednesday, December 30, 2009

Inspiring Inkin' Sale-a-bration Blog Hop!


It's Sale-a-bration time everyone!

Welcome to the Inspiring Inkin' Sale-a-bration blog hop.  Us "Inkies" have been busy creating some exciting projects using exclusive stamp sets that YOU can earn during Sale-a-bration.  For every £45 you spend during January and February you will qualify to receive a FREE, yes FREE stamp set from the Sale-a-bration flyer.  Please contact me for details about placing an order or if you would like to host a Home Workshop or book into any of my classes. 

Each blog on this "hop" will have the birdcage logo at the end of each post and you will see a link to the next blog on the hop, eventually you will come full circle back to your starting point, I hope you have a wonderful time on your journey!  Please leave comments as you visit, we would love to know what you think of our projects.

For those who have joined us from Amanda's blog, WELCOME!

******

Here is my first card using the Sale-a-bration "Wymsical Words" stamp set:

"Follow Your Heart" Side Step Card


Side-Step cards are a quick way of making a card with that "WOW" factor, I just love the 3D effect.

I have used the "Follow Your Heart" stamp from the Sale-a-bration set "Wymsical Words" and I just love the swirly font in the text on this set.  I stamped my greeting onto Certainly Celery and punched out using the 1 1/4" Circle Punch then layered onto a 1 3/8" circle in Rose Red, then onto a Chocolate Chip Scallop Circle which was punched out.  The Old Olive flower at the back of my greeting was from the Die Cut Blooms which can be found on page 83 of the SU Catalogue.

The main image is from the "Simply Said" stamp set, stamped in chocolate chip ink and coloured using the Rose Red Stampin' Write Marker, for the stems I used the Certainly Celery Marker.  I lightly inked the edge using a dauber with Chocolate Chip ink and layered this onto a piece of Chocolate Chip Cardstock.

The lower step on my card is covered with a piece of Rose Red cardstock edged using the Eyelet Border Punch and a strip of Rose Red Designer Series Paper to break it up.  My Flower is created using the 5-Petal Flower Punch, layered with Old Olive then one in Certainly Celery and a flower from "Simply Said" stamped and hand cut.  The centre of the flower has a brad sitting on a 1/4" circle punched from Chocolate Chip.

The middle step has three hearts stamped in Rose Red ink and using the Stamp-a-ma-jig with the 2-step stampin' technique I have stamped the floral heart in chocolate chip over the Rose Red image.  I hand cut these out and used my snail to place them accordingly.

The top step contains my greeting from "Wymsical Words" and a border in Rose Red Cardstock using the Eyelet Border Punch.

******

Here is my second card:

You're Too Kind


Again, using the "Wymsical Words" stamps I created this tent fold card in my favourite colour combination of the moment!  My base is Chocolate Chip with a block of Certainly Celery placed nearer the top of the card.  On this I layered a strip of Rose Red and matted with a piece of Regal Rose to which I attached a piece of 5/8" Certainly Celery across the middle and adhere with Sticky Strip on the reverse.

My three images are from "Pocket Silhouettes" stamped in Rose Red onto Whisper White cardstock, then hand cut into squares and layered onto Punched Scallop Squares using Dimensionals.

I stamped my greeting "You're too Kind" in White Kraft ink and then added a circle border at the top left of the card with a stamp from "One of a Kind".

******

And now to continue your journey you will hop to Vannessa's blog here!


Friday, December 18, 2009

Christmas Gifts


Can you guess what is hiding underneath this gorgeous combination of Old Olive and Chocolate Chip?  Well, Chocolate of course!  I covered some tubes of sweets/chocolates for my daughter to give to her friends and I was really pleased with how they turned out.


I covered the tubes with Chocolate Chip Cardstock then added a piece of "Merry Moments" Designer Series Paper around the middle and topped with a border using the Scallop Border Punch.  The tree and poinsettia images are from "Season of Joy" stamp set.  To cover the plastic lid on the tube I punched a circle using the Scallop Circle Punch and then stamped the Poinsettia stamp twice, hand cut and layered them with a brad.  The tube hidden inside just slides out easily to reveal the contents!


Wednesday, December 16, 2009

Purple Pleasures


This was one of the make and takes we completed at November's Monthly Stamp Class in Whitminster.  We used Perfect Plum and Pale Plum inks and cardstock along with Whisper White.  The images and greeting are from "Pocket Silhouettes" stamp set and are so versatile, suitable for any occasion, male or female.  We used the Eyelet Border Punch to create the lovely shaped corners on the card and also on the Perfect Plum layer along the bottom edge.  The greeting was cut using the Oval Punch and layered with the Scallop Oval Punch.  The edges were inked for depth using a dauber direct from the ink pad.  We used a piece of the Silver Elastic Cord wrapped around to create some texture.

If you would like to purchase any products from the Stampin' Up! Catalogue, attend any of my classes or host a workshop, please email me on stampinkerry@aol.com or give me a call.

Thanks for dropping by

Tuesday, December 15, 2009

Christmas Wedding


I am often asked to make cards for special occasions and this one is for a Christmas Wedding.  The colours are in line with the wedding colours as requested and I used Baroque Motifs and Mr & Mrs stamps sets.  I used Very Vanilla for my card base, layered with Bravo Bergundy and Basic Black.  I used the Eyelet Border Punch to add a feminie feel and flat back pearls from the Pretties Kit.  I inked all the edges with a dauber using the Bravo Bergundy ink pad.

Sunday, December 13, 2009

Customer Thank You's


I decided to make some envelope cards for my recent customers to say thank you for their orders.  I used Rose Red, one of my favourites, along with Old Olive and Whisper White.  The stamped image is from "Pocket Silhouettes".  I used the Word Window Punch to cut out my greeting and the Scallop Edge Border Punch for interest.  I added a piece of Rose Red Designer Series Paper on the bottom of the envelope, I love these papers, they are so versatile.

Thursday, December 10, 2009

Sweet and Simple


I was inspired by Amanda on this one, I love this colour combination and have used it previously as you may have seen.  I created a background using various stamps from "Circle Circus" inked in Chocolate Chip and Rose Red onto Whisper White cardstock then layered a piece of Chocolate Chip behind it.  I used the Scallop Edge Border Punch to create a strip along the bottom of the card and placed a piece of Rose Red Designer Series Paper above it.  I pierced holes in each scallop for interest and texture.  My greeting is from "Pocket Silhouettes" and stamped using the Stamp-a-ma-jig for correct placement.  I used the Mat Pack and Paper Piercing Tool to punch two rows of holes above the main image.  Purely sweet and simple!

Happy Stamping!

Monday, December 7, 2009

Monthly Class


Here is one of the Make & Takes from my monthly class last week held in the lounge at Whitminster Village Hall.  We used "One of a Kind" stamps along with So Saffron, Very Vanilla and Chocolate Chip cardstock.  The flowers are cut out with the co-ordinating "Boho Blossoms" punch and were stamped in Always Artichoke and So Saffron inks.  We placed a silver brad in the centre of one of the flowers for dimension.  We tied a bow on the tag using a piece of the 1/2" Striped Grograin Ribbon and used some of the Designer Series Paper from the "Tea & Crumpets" range.  All edges were inked using a dauber with Chocolate Chip ink.  Our title was placed using the Stamp-a-ma-jig.

Friday, December 4, 2009


Here is the card I made for my nephew's birthday, I used the boat stamp from "Nursery Necessities" and the greeting was from "Wow Flowers".  I teamed the images with Chocolate Chip, Kraft and Not Quite Navy cardstock and added a strip of Chocolate Chip Designer Series Paper.  I have used the corner rounder punch to round the edges of the layers to blend with the scalloped border.  I hope he likes it!

Thursday, December 3, 2009


I have been asked to make a card for a friend who is being a Godparent to twin girls so have made a few cards for her to choose from, this being one of them.

I used "Nursery Necessities" stamps on this one along with So Saffron, Perfect Plum and Pale Plum inks and cardstock.  The main background is from the Designer Series Papers in Perfect Plum and I distressed the edges for texture.  I used the small star stamp to create a subtle background on my So Saffron layer and punched a border using the Scallop Edge Punch and pierced each scallop using the paper piercing tool.  I printed my greeting onto Very Vanilla cardstock and punched a hole with the Word Window Punch into the So Saffron card to reveal the greeting beneath.  I used Dimensionals to raise my stamped images.

If you would like to order any of the products used in my card please email me at stampinkerry@aol.com or if you would like any information on Stampin' Up! products or becoming a Stampin' Up! Demonstrator you can call me on 07717 068 909 or 01452 740532.

Thanks for looking!

Wednesday, December 2, 2009

Anniversary Wishes


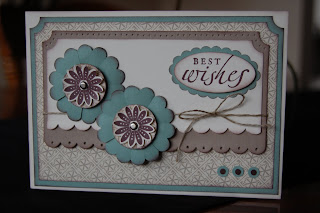
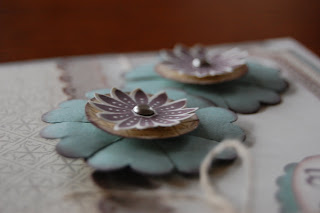
It is my parents Wedding Anniversary today so I made them a card using the Bella Bleu Designer Series Paper along with Kraft, Very Vanilla and Sage Shaddow cardstock.  I used the Scallop Circle Punch to create the blooms and stamped flowers from "One of a Kind" and cut them out using the Boho Blossoms punch.  I attached them onto a 1" circle cut from Designer Series Paper and added a silver brad for texture.  I inked all the edges in Chocolate Chip using a dauber.

My greeting is from "Sincere Salutations", cut with the Oval Punch and layered with a piece of cardstock cut with the Scallop Oval Punch.  I used the 1/2" Circle Punch for the corner cut-outs.  I wrapped a piece of Linen Thread around the top two layers of cardstock and tied with a bow.  I used Dimensionals to add height to my blooms.

Tuesday, December 1, 2009

Sorry for the absence!

I have been unable to post for a little while due to changing my Internet Provider but now it is all up and running again so I can get back on track!!


I have been preparing some items for sale at Craft/Christmas Fairs that I have booked and here is a nifty little number that holds a Gift Card, I found this tutorial on my travels whilst blog hopping one evening so thought I would give it a go.  I have used "Season of Joy" teamed with Old Olive and Real Red cardstock and inks.  The background of the gift card holder was stamped in Kraft White ink with the Snowflake stamp.

Here is the inside, I have cut away a slit using the Word Window Punch which is where the gift card sits.  I have threaded a piece of silver Elastic Cord from the back to the front and tied in a bow as a closure.


Monday, November 23, 2009

Team Swaps


Here is the swap I made for the Demo Team Meeting last Saturday.  I used Kraft as my base and inked the spiral tree in White Kraft Ink onto it.  I used the Scallop Edge Punch to create a border at the bottom and pierced holes in each scallop using the Piercing tool.  I stamped 3 tall trees from "Trendy Trees" in Old Olive and Chocolate Chip, hand cut them and used Dimensionals to adhere them to a piece of Rose Red Designer Series Paper which was matted with a layer of Chocolate Chip and Old Olive.  My greeting is from "Sincere Salutations" which I stamped onto a piece of Kraft cardstock and layered with Old Olive and Chocolate Chip, piercing the ends for extra texture using the Mat Pack.  I drew around one of the Die Cut blooms and layered two together and used the 1/4" and 1/2" circle punches along with an Old Olive Brad to centre the flower.  I adhered the flower with a Mini Glue Dot onto a thin strip of Chocolate Chip cardstock at the top of the card base.

Don't forget about the Gift Giving Guide offer that is still available, spend £45 on products from the Guide and receive a free, yes FREE Tag Punch worth £12.50.  Email me for details.

Sunday, November 22, 2009


Yesterday I attended the "Inkaholics" Demo's meeting and here are a couple of swaps I received from Rosie and Jane.  We had a lovely time chatting and stamping and couldn't really believe where the time went!!

Thank you Rosie for having us along to your wonderful Studio!

It is my birthday today so have been spending some time with my family, did managed to squeeze in a little shopping trip though!  My wonderful other half is taking me to London on Tuesday for a visit to Tiffany's for a birthday treat so really looking forward to that!


Friday, November 20, 2009


Just a quick post today to show you a card that I demonstrated last night at a workshop I held.  I used So Saffron, Chocolate Chip and Creamy Caramel, a lovely combination of colours along with the "Circle Circus" and "Oval Alls" stamp sets.  I used the Scallop Edge punch to create a border to the left side of my card and pierced the Creamy Caramel strip of card using the Mat Pack.  I attached a piece of 1/2" "So Saffron" Striped Grosgrain which I knotted for extra texture.  My first layer was created using a piece of the So Saffron Designer Series Paper, which I then layer with Whisper White cardstock that cased my stamped images.  The greeting was stamped using the Oval Alls set and cut using the co-ordinating Scallop Oval and Plain Scallop punches.  To give the card depth I inked the edges of my mat layers with Chocolate Chip ink using a dauber.  I also cut some flower elements from my stamped images and backed them with dimensionals to give them height and added a flat backed pearl from the Pretties Kit.

Tuesday, November 17, 2009

Circle, Circles!


Circles, Circles everywhere, I just love the "Circle Circus" set, not that you hadn't noticed!!  Here I have used Rose Red and Chocolate Chip inks and cardstock, these two colours work really well together and I threw in a strip of Kraft to break it up!  I used the Stamp-a-ma-jig for correct placement of my greeting which is from the "Sincere Salutations" set.  

Thanks for dropping by!

Sunday, November 15, 2009

3D Stamp Class


So here is what I came up with for the 3D Stamp Class I held on Thursday.  I saw the idea on SCS and designed my own template for a box and some co-ordinating gift tags.  I was pleased with the end result after several attempts at getting the measurements of the box correct!!  We used Kraft cardstock as the box base and inked it with the Jumbo Handle and "So Swirly" wheel in Not Quite Navy Ink.  The tags were created using Very Vanilla cardstock along with "Bella Bleu" Designer Series Paper and the wonderful "Circle Circus" stamps.  I hope you ladies enjoyed your evening, I certainly did, thanks for coming along.


Friday, November 13, 2009


Another request by a friend so I thought I would use the 3D technique again with the "Circle Circus" set.  I printed my greeting onto Very Vanilla cardstock and cut out with the Oval Punch, then layered this onto a Not Quite Navy Scallop Oval punch out. The background stamp "bubbles" (that is my name for this one!) is also from "Circle Circus" inked with Not Quite Navy to match the rest of the card.  I used a piece of 5/8" Grosgrain Chocolate Chip Ribbon vertically behind the 3D Scallop Circle image to add texture and also punched 3 circles in Not Quite Navy using the 1/4" Punch then layered with 3 tiny circles cut using the handheld 1/8" Circle Punch.  I inked all the edges of the Very Vanilla cardstock using a dauber to add depth.

Tuesday, November 10, 2009

18th Card


I was asked to make an 18th card by a friend and here is the end result.  She asked for pink so I decided to use Rose Red teamed with Chocolate Chip and a smidge of Kraft.  I have used the large stamp from "Circle Circus" and cut elements from it and raised them with Dimensionals.  I added a flat back pearl to centre one of the raised flowers which were stamped in Rose Red ink.  I printed my greeting as a name was requested and die cut the number 18.  I added a piece of knotted 1/4" Grosgrain ribbon to my greeting panel and pierced holes at the edge using the Mat Pack.  Simple but sweet!

Stamp Camp Class


Here is a sneaky peak of the boxed set of gift tags, the 3D project we will be creating at my Stamp Camp Class this Thursday, 12th November 2009 at my house.  Cost of the class is £4.50, all you need to provide is adhesive.  Class starts at 7.00pm through to 9.30pm.

If you would like to book in please let me know asap as places are limited.

Thanks, Kerry x

Sunday, November 8, 2009

Christmas is Coming!


I have been making some mini cards recently and here is a Christmas Envelope Card I made using the lovely "Season of Joy" stamp set.  I have used the Merry Moments Designer Series Paper along with Old Olive and Whisper White cardstock.  I stamped the Poinsettia in Real Read ink, hand cut it and finished with a brad, adhering with a Dimensional to make it look more 3D.  Using the Stamp-a-ma-jig I positioned my greeting just where I wanted it and finished the card off with a piece of Real Red 5/8" ribbon which I tied at the front with a knot.

Thanks for stopping by!

Friday, November 6, 2009

Tree Trio


We created this card at the workshop on Monday which was inspired by a very similar one in the Stampin' Up! 2009/10 Idea Book & Catalogue.  It was quite a challenge using 3 colours with so many of us but we got there in the end!

I just love Rose Red and Old Olive together, a really lovely combination.  We added a Chocolate Chip border cut with the scallop edge punch and a flower embellishment along with some linen thread.  We traced around a die cut bloom and hand cut the flower shape adding a brad to the centre.  We used the Standard Stampin' Around Handle along with the "Funky Forest" wheel to use as a background for our main images.  The greeting is also from the "Trendy Trees" set.

Thursday, November 5, 2009

Thank You's


I needed to make some Thank You cards so here is what I came up with.  I am so loving the "Circle Circus" set at the moment so I decided to use it on some small 3x3 cards.  My card base is Basic Grey, topped with a strip of Rose Red Designer Series Paper and Cardstock which I pierced using the Mat Pack.  The circle images are from the "Circle Circus" set and the greeting from the "Trendy Trees" set which is so cute!  I stamped the images in Rose Red onto Whisper White card then matted it onto Basic Black cardstock.  Quite simple but really quick and cute!

I am offering some Ribbon and Designer Series Paper shares so will post all the details tomorrow.

Tuesday, November 3, 2009

Stampin' Card Workshop No. 1


My first monthly Stampin' Card Workshop was yesterday and this is how it all began, thank goodness I was too busy to take any other pictures as by the end of the night it was not a pretty sight, but well worth all the effort.  I really enjoyed it and I hope all those of you who attended enjoyed yourselves too!!

The winner of the Door Prize Draw was Louise, well done, I will be in touch to deliver your prize!

Monday, November 2, 2009

Sneaky Peak


Just a sneaky peak of something I am making for my ladies attending tonight's workshop, a little inspiration for them to take away with them at the end of the evening!

Sunday, November 1, 2009

A Great New Offer!


From 1st November through to 29th December, when you spend £45 on products from the above Gift Giving Guide, you will receive a FREE, yes FREE Tag or Small Tag Punch (worth £12.50).

Here is the list of all qualifying products and the corresponding catalogue page numbers:-

Flower Power Simply Sent Card Elements - Page 77
Wow Flowers Stamp Set - Page 77
Rock Star Simply Sent Card Elements - Page 77
Starring You Stamp Set - Page 77
Fresh-Cut Notes - Page 80
Fresh Cuts Stamp Set - Page 53
Cutter Kit - Page 90
Latte Designer Buttons - Page 83
Playground Designer Buttons - Page 83
Medium Flat Cellophane Bags - Page 80
Spotlight on Christmas Stamp Set - Page 22
Old Olive A4 Card Stock - Page 72
Whisper White A4 Card Stock - Page 71
Real Red 5/8" Grosgrain Ribbon - Page 87
Christmas Jingle Simply Scrappin' Kit - Page 79
Real Red A4 Card Stock - Page 72
Old Olive 5/8" Grosgrain Ribbon - Page 87
Petal Party Simply Scrappin' Kit - Page 79
Sunny Day Simply Scrappin' Kit - Page 78
Love Stories Simply Scrappin' Kit - Page 79
Circle Circus Stamp Set - Page 55
Bold Brights Stampin' Write Markers - Page 72
Bold Brights A4 Card Stock - Page 72
On Board 12.7x12.7cm Art Journal - Page 82
Spiral Punch - Page 88

If you are interested in purchasing anything from the Gift Giving Guide please contact me on stampinkerry@aol.com or 07717 068909

Thanks for stopping by!

Saturday, October 31, 2009

Stampin' Saturday


Yesterday afternoon, in a moment of lonliness, I decided to invite a couple of friends around to be creative with me as I knew I was going to be "home alone".  I prepared a make and take project using the wonderful "Circle Circus" and Bella Bleu Designer Series Paper.  We had a lovely time, chilling out, being creative and discussing the endless possibilities produced with this stamp set.  Thank you ladies for coming along, hope you enjoyed yourselves!


I also did a little demonstration using one of the "Love Notes" envelopes, with the "One of a Kind" stamp set, this is just so cute.  The paper is from the "Bella Bleu" Designer Series Paper.
Don't forget, if you would like to order any Stampin' Up! products, just give me a shout on stampinkerry@aol.com

Check back soon for details of a new Stampin' Up! offer that begins  tomorrow.

Thursday, October 29, 2009

Simply Said, thanks so much!


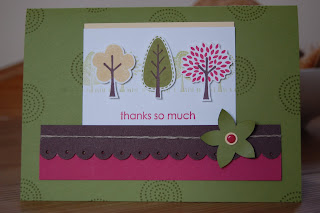
I created this "thank you" card using the lovely "Simply Said" stamp set.  I randomly stamped the images with Taken with Teal, Chocolate Chip and Pumpkin Pie ink pads onto Whisper White card and cut and raised the 8 petal flower with a dimensional. I layered this onto a piece of Chocolate Chip card.  The greeting is from the "Trendy Trees" stamp set and positioned using the Stamp-a-ma-jig onto the card base of Old Olive.  The top border is Chocolate Chip Designer Series Paper and I added some texture with two loops of 1/4" Chocolate Chip Grosgrain Ribbon

Tuesday, October 27, 2009

Open Day Make & Take No. 2


This was the 2nd make and take project we created at the Open Day last Saturday.  I just love Rose Red and Old Olive together, really bright and fresh.  We used two newly released stamp sets "Say it with Scallops" and Circle Circus, both of these sets work with the Stampin Up Circle Punches and Scallop Square Punch.  The greeting "For You" was from "One of A Kind" stamp set.  We stamped images from "Circle Circus" and hand cut the 6 petal shapes in two different sizes in Old Olive and So Saffron then layered them with Dimensionals.  The centre piece is stamped in Old Olive then a second image is stamped using the Old Olive and Rose Red Stampin Write Markers two create a two colour image and then we hand cut the middle square and raised it using Dimensionals.  We used the lovely Rose Red Double Stitched Grosgrain ribbon across the centre of the card to add texture.  The greeting was stamped using Always Artichoke to ensure that it stood out against the Rose Red Designer Series Paper.

If you are interested in purchasing any of the stamp sets or materials used in the above project, please email me on stampinkerry@aol.com, postage will be £3.95 per order and can be delivered direct to your door via a courier service!


Monday, October 26, 2009

Open Day Make & Take


Here is a sample of one of the make and take projects we created at my Open Day on Saturday, I was inspired by a similar design created by Jane.  We used the "Season of Joy" stamp set along with Old Olive, Chocolate Chip, Ruby Red and Very Vanilla card.  We randomly stamped the snowflake image onto the card base in Old Olive ink, then stamped the tree in the same colour, cut it out and raised it with dimensionals.  Using the Stamp-a-ma-jig we stamped our greeting in Real Red ink then stamped the small poinsettia twice in the same colour.  We used the 3/4" punch to cut the old olive circle and 1/2" punch to cut out the small poinsettia then layered them together.  We used the Cropadile to set the eyelet on the Ruby Red band at the bottom of the card and added a Chocolate Chip knot and two rows of paper pierced holes for extra texture.  This piece was raised using Dimensionals.  Inside we stamped around the edge of a piece of Very Vanilla cardstock to complete the card.


Sunday, October 25, 2009

Door Prize Winners

I would firstly like to say a big thank you to all you ladies who came along to my Open Day on Saturday, it was a great success and it was lovely meeting you all.  I am looking forward to the first Stampin' Card Workshop on 2nd November, hope you are too!  I would especially like to say a big Thank You to my wonderful friend Jane who came along to give me moral support, which was greatly appreciated, also to my mum for helping out on the day.

Well, I have picked the names from the Door Prize entries and the winners are as follows:

1st Prize - Emily Miles
2nd Prize - Marilyn Hulbert
3rd Prize - Anne Maddison

I will be contacting you all in due course to arrange delivery of your prizes.

Friday, October 23, 2009

New Workshop Dates


I am holding a monthly workshop on a Monday at Whitminster Village Hall, just off J13 of M5, here are the dates:

2nd November 2009
30th November 2009
25th January 2010
22nd February 2010
22nd March 2010
19th April 2010

I am also thinking of running some Saturday Workshops too, so keep an eye out for the dates which will follow shortly.

Have a busy day preparing for the Open Day tomorrow so just a quick post to show you another card I made.


I used Old Olive, Chocolate Chip and Not Quite Navy cardstock and stamped an image from the "Simply Said" set onto Whisper White Card in Old Olive ink.  I stamped the small flower from this set 3 times and cut and layered them onto the main image with Dimensionals.  I layered the image onto Close to Cocoa card and paper pierced the corners.  I used my Scallop Edge Punch to create a border and then layered Chocolate Chip Designer Series Paper and Not Quite Navy cardstock on top and finished with a grosgrain ribbon knot.  My sentiment is from the "Ovals All" set and cut out using the Scallop Oval and Oval Punches.

Thanks for looking!

Wednesday, October 21, 2009

Ahoy There!!


Here is another card using "Nursery Necessities", this is a really great set for creating cards and gifts for the younger generation, also for those newly borns!  The middle boat has had a 3D effect given by stamping a second image in the same colour, then cutting out the sails and raising them with dimensionals.  I used Chocolate Chip and So Saffron ink pads on the boats and then the new Kraft White ink pad for the greeting, which I also embossed.  I used the Scallop Edge punch on the Not Quite Navy strip of cardstock to create a border and layered it with a strip of Chocolate Chip Designer Series paper, the Corner Rounder was used on the chocolate chip layer where the boats are mounted onto, on the edge of the card and finally on the greeting layers. 

Thanks for dropping by, dates for my new monthly workshops will be posted tomorrow.

Monday, October 19, 2009

So Saffron Stars!


I have finally had chance to sit and be creative with my new stamps and here is my first creation, a "new baby" card welcoming the "little one".  The star stamps are from "Nursery Necessities" stamped with So Saffron ink onto Whisper White card.  The middle star has been clear embossed and raised using Dimensionals.  It is difficult to see from the picture but I stamped a background onto the main body of the card using one of the tree stamps from the newly released "Trendy Trees".  I used the Scallop Edge Punch to create a border and made holes in each scallop with the Paper Piercer. 


Sunday, October 18, 2009

Gift Box


I saw the template for this cute little gift box on Amanda's blog and thought that I would give it a go.  I have used the Designer Series Paper in Chocolate Chip and used the Chocolate Chip cardstock, along with the Scallop Edge Punch to create a border around the bottom, which is difficult to see in the photo as it is quite dark.  I also used the Circles Punches to cut out my stamped image along with the ribbon holes and the Oval Punch to create the handles.  So cute, just the right size for one of those cute minature boxes of chocolates you can buy. 

Saturday, October 17, 2009

Open Day & New Workshops

I am holding an Open Day to launch some new monthly stampin' card workshops that will commence on Monday 2nd November 2009.  The Open Day will be held at Whitminster Village Hall (just off Junction 13 of M5) details are here, http://www.grcc.org.uk/village_halls/325-Whitminster_Village_Hall on Saturday 24th October from 10.00am-4.00pm.  There will be an opportunity to view the new catalogue and idea book, participate in some make and takes and generally chat about the new forthcoming workshops.  There will be completed projects on view and also a raffle!  I will post all the dates for the workshops shortly.

Look forward to seeing you there!

Thursday, October 15, 2009

Starter Kit Arrived

Oh how lovely it was to receive my kit today, a box full of delicious SU goodies and I just can't wait to get inking with them!  My only dilema is which set shall I ink up first!

Tomorrow I will give you some details of a new Card Workshop that I will be running along with an Open Day to launch it so be sure to check back for the details!

Wednesday, October 14, 2009

Bag with Cards


I have come across many tutorials for this kind of Card Bag, but I needed one that would fit my small square cards so I sat the other night designing my own template.  I was surprised at how long it took me and I take my hat off to all those talented ladies who create endless projects and tutorials!

Because of the height of the bag I had to use a sheet of 12x12 Designer Series Paper in Pumpkin, although I could have used A4 card with a join.  The Designer Series paper is great quality and this bag is actually quite sturdy, the 4 cards fit snug along with their envelopes and would make a lovely gift.  I was really satisfied with the end result and all that paper I used designing the template will of course be recycled!!

Tomorrow I am hoping to post details of a monthly Card Workshop that I will be holding locally and an Open Day to promote it!

Tuesday, October 13, 2009

Carte Postale


Just a quick post this evening and guess what, another card using the Chocolate Chip Designer papers and Carte Postale stamps, this set has now retired and I will be moving onto other stamp sets as soon as they arrive with me!!  Thank goodness I hear you all shouting!

I have used the Scallop Edge Punch to create a border around my stamped image and tied Certainly Celery 5/8" grosgrain ribbon around the top section of the card.  My sentiment is stamped using the "Ovals All" stamp set and punched out with the Oval and Scallop Oval Punches.  The centre flower in the image has been double stamped, hand cut and a dimensional has been used to give depth.

Supplies Used:
Whisper White & Chocolate Chip cardstock
Chocolate Chip Designer Series Paper
Certainly Celery 5/8" grosgrain ribbon
Stamps from the "Carte Postale" (now retired) and "Ovals All"
Scallop Border, Oval and Scallop Oval Punches
Chocolate Chip & Old Olive Stamp Pads
Dimensionals

Monday, October 12, 2009

Thank You Notes


Last week it was my daughters birthday and I thought that it would be nice to send out Thank You notes to everyone, just another excuse to get stamping really!!  I used a retired set called "Friendship Blooms" and the largest flower worked well with this sized card.  I used Old Olive and Pink Pixie ink pads to stamp the flowers and cut and layer them to give depth.  I used the Oval Punch to cut out the greeting, the Paper Piercing tool to add interest and brads for the centres of the flowers.

Thanks for stopping by

Sunday, October 11, 2009

More Chocolate Chip!


Upon my travels I have come across many blogs that showcase 3D projects and thought that I would spend some time last night creating similar ones but with my own measurements, wow, I was shocked just how much time I sat, getting things wrong and starting again, but eventually got there and will show you in the next few days what I made.

I wanted to use up some scraps of the Designer Paper that I had left on my desk so decided to alter a notepad and was quite pleased with the end result. Yet again I have used a stamp from the retired "Carte Postale" set which by nowm you must know I am liking at the moment!! The paper is from the Chocolate Chip Designer Series range and I used the scallop border punch and circle punch.

Saturday, October 10, 2009

Loving Chocolate Chip!

I have spent the best part of today sat in my craft room creating, mostly using the stamps from "Carte Postale" (recently retired) and the Chocolate Chip Designer Papers. I am loving the "Oval Alls" stamp set, great for all card occasions and they co-ordinate with the Oval and Scallop Oval punches which is great. I like the simplicity of this card, not fussy at all, just quite plain, but I like it that way!

Here is a list of supplies that I used:-

Whisper White Textured Cardstock
Chocolate Chip Cardstock
Chocolate Chip Designer Series Paper
Chocolate Chip Ink Pad
Ovals All Stamp set
Carte Postale Stamp set (just retired)
Scallop Edge Punch
Oval Punch
Scallop Oval Punch
Paper Piercer
Thanks for stopping by!

Friday, October 9, 2009

A New Venture!


Hi, and welcome to my blog, a place where I will be sharing with you my paper craft creations and obsessions! I have recently become and Independant Stampin' Up! Demonstrator and felt the need to create this blog to showcase the lovely products available from Stampin' Up! I will be commencing a Card/Scrapbooking Club locally very soon and look forward to meeting lots of lovely people who also enjoy crafting, I am planning on holding these monthly meetings in the village of Whitminster, watch this space!


Well to start with, I wanted to show you a couple of cards I made recently using a stamp from the set "Carte Postale" which has just retired. 

Supplies Used:

"Best Wishes"

Carte Postale Stamp Set - retired
Oval All Stamp Set (for the greeting)
Whisper White Textured Cardstock
Chocolate Chip Cardstock
Chocolate Chip Designer Series Paper

Certainly Celery 5/8" Grosgrain Ribbon
1 1/4" Circle Punch
1 3/8" Circle Punch


"Cheers to You"

Carte Postale Stamp Set - retired
Lots of Thoughts Stamp Set - retired
Whisper White Textured Cardstock
Chocolate Chip Cardstock
Chocolate Chip Designer Series Paper
Large Oval Punch
Scallop Edge Punch


Thanks for stopping by.